
The day you upgraded to a bike with one those new-fangled vacuum taps things was a momentous occasion indeed. No more did you fumble with the petrol tap every time you started or switched off the bike. It was nothing short of a miracle!
But like anything, it can go wrong and some people are put off by trying to fix it. A diaphragm and O-rings are pretty much all there is to it, so this is a quick tutorial on how to fix it. Bearing in mind I've actually taken this tap off the tank four times since painting it, to try and get it to work correctly. It's been a pain, but today I think I nailed it.

Also, number two carb needle valve could be leaking slightly and allowing it to flood the cylinder when left a couple of nights. Had the petrol tap switched off correctly it wouldn't have been an issue, but if my brother's sister's aunties' nephew wasn't my second cousin I wouldn't be in this palaver anyway. What?
Back to the f*cking tap. (And pardon my French.)
Once the tank was painted, the old petrol tap went on as per. No leaks, everything working, happy days. A trial run up the road and all was well. The very next day, it didn't spin over properly on the starter and sounded "compressioned" up (that's not actually a word unless you're a mechanic).
But what that means is, there's fluid in one of the cylinders and, because you can't compress a liquid, the engine didn't want to spin easily [initially]. A quick look over the basics soon told me that number two cylinder was full of fuel. A more in-depth look told me it was coming through the vacuum hose from the fuel tap. This can only mean one thing — the diaphragm is split.

The tap stripped down again. I'd already bought new O-rings for the brass screw because they were worn out and allowing fuel past.

New diaphragms.
If you don't want to shell out for a new tap, you can buy aftermarket diaphragms. I bought one from Wemoto and it arrived a couple of days later. So the tap came off and was disassembled. The old diaphragm was crinkled from fuel and the aluminium washer attached to the back of it had broken. Because the rubber is so thin I carefully rubbed both of the mating surfaces of the petrol tap on fine wet & dry to take out any imperfections. Happy days.
The plunger and O-ring move in and out of the four raised parts of the tap and seal the flow of fuel. When there is no vacuum (engine off), a spring pushes the plunger back into the housing and seals it off.

The next day the tap was completely soaked in petrol around the diaphragm housing. By now I was considering a new tap instead. But I took it off again and made a gasket to go with the diaphragm, put it back together and all was well.
Or so I thought. I left the bike sat for a couple of days and tried to start it, it had fuel in number two again! Checked the flow from the tap and, sure enough, it was flowing without the engine running.
Tap back off and stripped again! Then I found that the plunger isn't as long as the original and the O-ring couldn't touch the petrol tap. Was it the wrong part? Is it just typical aftermarket junk? I considered a new tap again, but all I really need to do is machine down the four tabs. If they were lower, the plunger would reach the inside of the tap.
With no access to a milling machine, I decided to try the drill press with a small grinding wheel.
This didn't work so well so I used a Dremel and took them down to my marks, then punched a round disc of emery cloth out and sat that on a miniature cutting wheel and placed that in the drill press. This finished off the tap nicely.
This didn't work so well so I used a Dremel and took them down to my marks, then punched a round disc of emery cloth out and sat that on a miniature cutting wheel and placed that in the drill press. This finished off the tap nicely.

I put a small rubber hose in the top of the tap (the inlet) each time I took a bit more metal off, and checked the plunger was sealing the tap off.

There's the gasket I had to make to seal the housing.
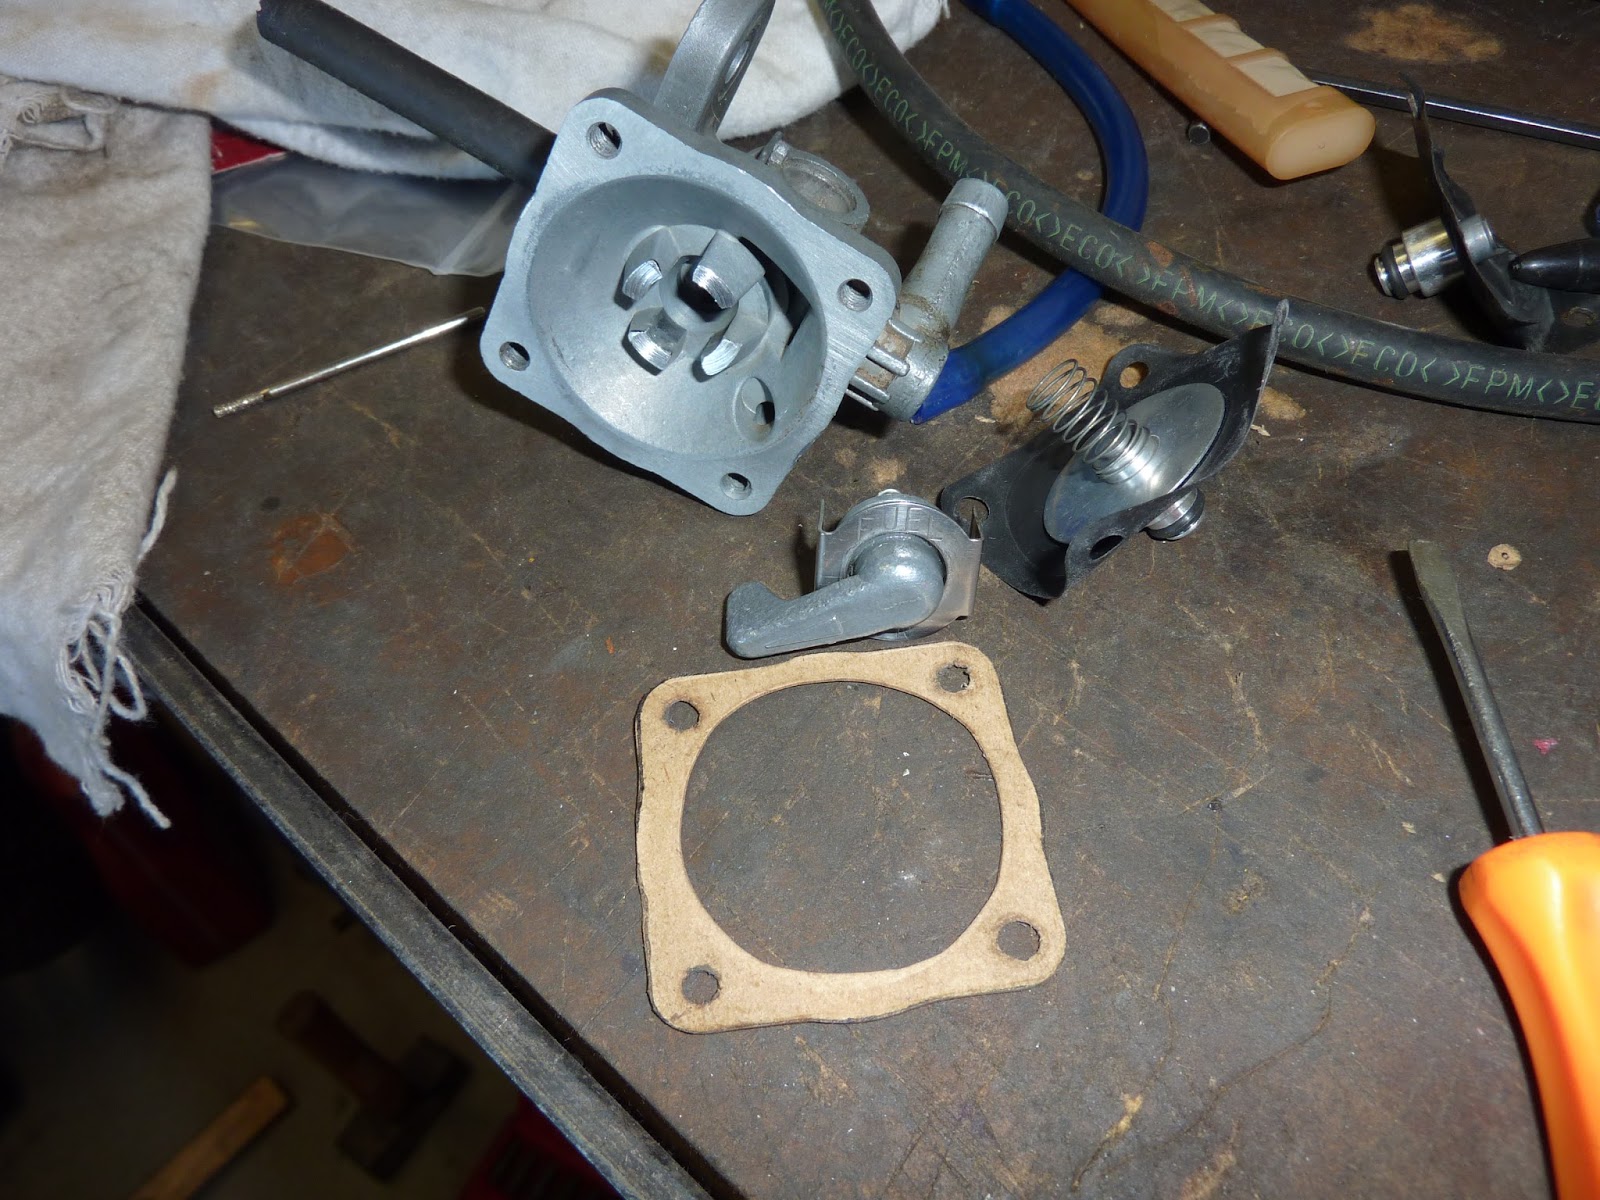
This is the part of the tap that changes the flow from ON to RES. There is no PRI function on this particular tap, that's done via the brass screw. Just so you know, the tap positions work like this:
- ON is for normal use, leave it here and forget it.
- RES is to get the last dregs of fuel out to get you to a petrol station.
- PRI is to allow fuel to fill the carbs after a rebuild etc.
If you've had to use RES, remember to change it back to ON when you've refilled.

This spring is all that keeps that plunger against the tap to prevent fuel flow. Vacuum from the engine sucks the diaphragm and overcomes the spring pressure to let fuel flow down to the carbs.

And then then the diaphragm cover goes back on.

This is the view from the other side. With no vacuum, the piston is now pushed against the back of the tap.

As I apply vacuum, the plunger moves back and lets fuel flow freely. Easy.

With a new O-ring fitted to the moving part of the tap, it was clipped back into place. Hopefully this will be the last time it comes apart.

I refitted it and filled the tank with petrol for the umpteenth time and voila, no leaks and the fuel stops flowing when the engine stops. Yeah you could just buy a new tap, but where's the fun in that?
No comments:
Post a Comment