Showing posts with label GSXR 1000 K5/K6. Show all posts

Tuesday, February 7, 2012

GSXR 1000 K5/K6 Suspension - Swingarm and Shock

Boing Boing Boing!


Although there wasn't much wrong with the rear of the bike, apart from the tired shock absorber, I wanted to replace any worn needle roller bearings in the swingarm and linkages. While the swingarm was out, I could also repaint it because of a few scratches.

With the bearings all ordered, replacement was pretty straightforward. I replaced the two main swingarm bearings too because I could feel the tiniest amount of play in there. This was exactly the same afterwards though, so I guess a tiny bit is normal.


Bearings were removed with hammer and punch when necessary, and using sockets with 12mm threaded bar. They were all pulled back in with the threaded bar, sockets and large washers. Here's the finished linkage.


Scratches were flatted out with 400 then 800 grit paper and etch primer applied to the bare aluminium. Next it was primed, and finally painted with satin black. It came out well considering the chain was still wrapped around it!


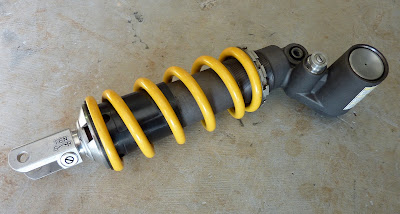
The shock, although in need of a freshen up, was going back in. Maybe a rebuild in the future.


A lack of pics doesn't help, but the job was relatively simple and the swingarm pivot tool is definitely needed to avoid damage to the swingarm spindle nut.

GSXR1000 K5/K6 Suspension - The Forks

This is where the fun started.

All I wanted to do was chuck another couple of seals in (not that they were leaking), and change the oil. A cartridge revalve, and maybe even a spring change would have been nice, but costs needed to be kept down so I decided to keep it basic.

Some form of spring compressor is needed to disassemble them properly so it was out with the welder to knock up a quick tool. It ain't pretty, but it works. The bolts, filed down to 8mm on the ends, screw into locating holes on the plastic tube above the fork spring allowing you to push down and compress the spring to allow access to the locking nut below the fork top. 

At least that's the idea. It's useful if you're generously proportioned too because those springs take some compressing! In the end I reverted to two ratchet straps around the tool and then around the wheel spindle reinserted in the bottom of the fork leg. This works a treat, but it's still a two man job.


The following picture will give you an idea of the assembled unit within the fork leg itself. This is what you'll get if you just remove the 8mm Allen bolt from the bottom of the fork leg instead of removing spring first. You can see the cartridge, the spring, the plastic tube and the fork top nut complete with rebound and preload adjuster.


Unfortunately, once engrossed in the forks, the pics stopped, but here's a brief description of reassembly. 

I'd already bought new fork seals off eBay (43x55x9.5/10.5), but as Davey always says "The poor man pays twice" and, sure enough, they were useless... but I was yet to find that out. 

So, cartridge refitted (spring must be removed beforehand), fork tubes together and now we just needed to fill with oil and bleed the damper assembly. This involves filling the fork with the correct grade of oil - don't just risk a "5W" hydraulic oil, this was also my undoing... but I was yet to find this out too. Buy a well known, or recommended, fork oil from a motorcycle dealer because every make of oil and grade has a different viscosity even if it says 5W on the bottle. Another lesson learned.

Around 600ml of oil is poured in, and then you can bleed the damper. The damper rod must be pulled up and pushed back down several times steadily until the resistance is the same all the way through the stroke. There are fork bleed tools you can buy to make this easy. My advice is to leave the fork for ten minutes at this point and then retry to allow any bubbles/cavitation to disperse. 

Now you can set your fork oil height. Check manufacturers recommended heights and ensure the outer leg is as far down as possible. Hold the fork upright and check how far down the oil is. A plastic tube zip tied to a piece of welding rod and a syringe is the ideal way to remove the right amount of oil. Just mark the welding rod at the right height, insert it into the fork leg and suck out excess oil. All good? Cool, time for the spring.

Refit spring, washer and plastic tube. Compress spring, pull damper rod back up through (another piece of welding wire) and fit the special plate (in the pic) above the spring and under the locking nut to hold down the spring while you refit the fork top nut (don't forget to refit the rebound adjusting rod). 


On the GSXR, the lock nut must be exactly 11mm from the top of the damper rod before tightening the fork top nut assembly; this allows for the correct amount of rebound adjustment.

Now the plate can be taken out, the spring compressor removed and finally the top nut can be screwed back into the fork leg. Reset your preload, compression and rebound screws to standard positions, or to your own preferred settings if you'd already experimented previously, and refit in the bike.

So what went wrong???

Where do I start? Well the bike was sat on the stand for about a week while I was carrying out work to the rear suspension when the right fork began to leak! DOH! 
By now the bike was almost back together so I decided to give it a shakedown run first before stripping the fork again. By the time I got back, the leg leg had started leaking - not impressed.

Forks back out, seals obtained from a dealer (not genuine, but Japanese made and a better feeling material), filled with oil, bled again - back in bike. No leaks, but not impressed with feel from front end. Doesn't appear to be any rebound or compression adjustment, bike reacts like a pogo stick. You can still make progress, but the front feels likes it's losing grip when leant over at high speed.

Forks back out to check lock nut adjustment (11mm remember?). All good, and oil height ok. Refit into bike, but no matter what I do to the adjustment, I can't improve the comfort and the bars are hammering my hands on every ride! So at this point I'm considering a different grade of oil, but the more I read about the K5/K6 Gixer, the more I understand that the forks are a weak point unless revalved... interesting. 

Time to give ProMechA a ring.