
This bike was a very cheap project and, although I should ignore it for the time being, I keep delving in and doing different things to it. I already made up a good set of carbs for it, got it running, rebuilt the rear master cylinder because it was dripping etc. and then I decided to check valve clearances. Oh, and also bought a camchain for it because it sounds like it's stretched to buggery.

So rather than strip the engine and, consequently, end up replacing all of the worn or moving parts, I'm treating it as a "repair as necessary" to get a better idea on engine condition — hey, it might yet be useable. If money is no object to you, just rip it apart and make it as new, but if you're doing things on a budget, then this could be ideal for you.
As the previous post suggests, I've checked clearances, helicoiled one of the cam cap threads and also needed some shims grinding. A new lad at work, who happens to come from a toolmaker/machinist background, was able to get four ground down for me one night so all the inlets are sorted — cheers Ryan!
I have one rogue exhaust shim to replace because someone used a 29mm diameter shim instead of a 29.5mm, but that's an easy fix. So, back to the cam chain.
The biggest issue associated with cam chain replacement is riveting the master link correctly, but the internet is full of cracking methods, such as:
- Using two hammers either side of the link (this does work, in a fashion).
- Using a nut splitter to "spread' the pins.
- Relying on the press fit of the side plate to hold it together (seriously?).
- Some are even proud of tacking the side plate on with a MIG welder (oof!).
All methods that will work, and some better than others, but not really my cup of tea. Chains are put together pretty accurately, and the side plates need to be a certain distance away from each other. Too tight, or uneven, and it'll grind away on your sprockets and do you want that happening inside your engine?
For me, if it can't be replaced properly, I'm just not keen. You can take liberties with some things, but for something spinning around the engine at 6,000RPM and faster, I like it to be right.
One new D.I.D. endless chain with an extra split link.

Enough drivel, on with the job.
With tank and rocker cover already removed, there is plenty of access on this engine to replace the chain. It will go as follows, time up engine to TDC on 1 & 4 and check the camshafts. It's good to know that everything is right before you delve any further.
The No.1 arrow on the exhaust cam faces forward, level with the head, and No.2 arrow goes straight up. Count twenty pins from that arrow to No.3 on the inlet cam and we're in business.

The TDC mark just visible between the points tells me the crank is in the right place.

The camchain tensioner can stay in place for this operation. Just turn the spring-loaded wheel to release the tension and pull up on the chain. There is a 12mm nut on the opposite side holding an M8 grub screw — undo it and turn the screw clockwise until it locks the tensioner plunger (keep hold of the chain until tightened). The chain will now remain slack.

Like that and, yes, that's a stretched chain.

The guide in between the sprockets just pulls out (I think this was discontinued on later models). There is an arrow on it which faces forwards.

Because someone has already taken the liberty of swapping some of the M6 bolts for UNC, I decided to take pictures so it's easier to remember where to put them. Far easier than trying to screw them into the wrong threads anyway. If, and when, the head comes off this bike I'll probably just helical the lot. For now though they're holding, so they can stay.

With cam cap bolts removed (evenly), the exhaust cam can be taken out. No need to worry about losing the chain into the engine at this point because the inlet is still in place.

The cam caps have kindly been marked to make it easier when refitting. It's as easy as A, B, C... D.

You never know what you'll find in an engine. Here we have three UNC bolts and a way-too-short M6 bolt. In their defence they did "make" a new thread for the M6 out of epoxy, an insert or chewing gum so it does hold. I'll leave that for a different day. I'm only interested in threads that won't hold at all (of which there were another two).

The important bit!
Once you remove the inlet cam, that chain is going south. You might be able to recover it but it will be a pain so get a zip tie and secure it now. The reason we take the camshaft out is because, when winding the new chain round, we don't have to fight with valves against pistons. This will become clearer later.
Also, I mentioned removing the cam caps evenly. The correct method is to use a tool to hold down the camshaft while you undo all bolts first. This ensures no undue stress is placed on the threads.
Having removed a lot of camshafts, I've yet to use a tool first and never had a problem. I'm not saying it's right, but I see no issue as long as you do it step-by-step. The threads are usually plenty long enough to avoid any damage and, by the time the valves have seated and there's no more spring pressure, you'll find the caps haven't lifted much at all.

The right tools.
This is a great piece of kit. It breaks the old chain easily, presses the new side plate on, and finally peens the pins over to look like the original links. I know nobody wants to buy one of these to replace one cam chain, but the finished product makes it worthwhile. Maybe an owners club buy?

Here it goes. With plenty of rag to stop the link disappearing within, the tool is set up like so. The chain sits on the guide of the tool, and the changeable tool head (next to the thread) is set up so the breaker pins push on the link pins. It pushes them through very easily.

You can just see them being forced into the slots of the tool.

So far, so good. The side plate now comes off easily and stays in your hand, not the engine.

Keep zip ties with you to secure the chain, or use a vice grips, string, maybe an anchor — up to you.

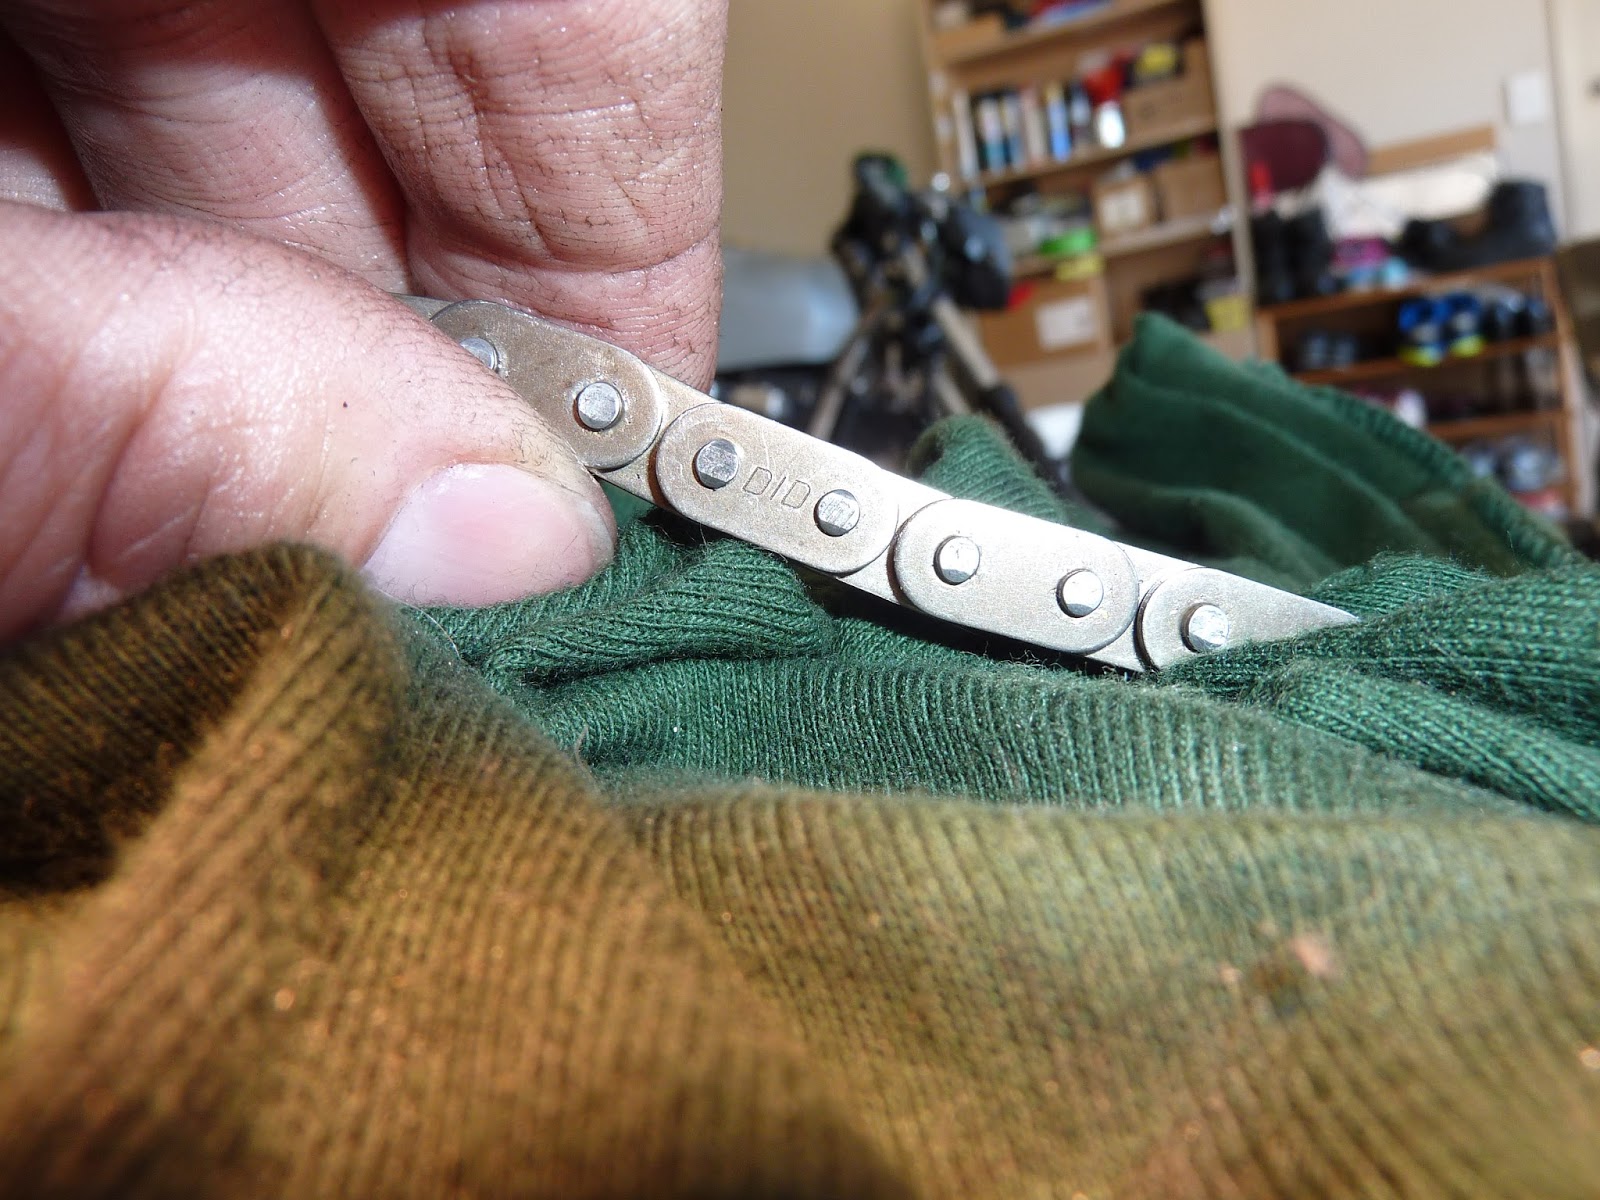
Splitting the new chain. As much as I hate to break a new chain, unless the engine is being split, there's no choice. Another reason I want the new link to look original.


The new chain is 90mm long. Measure the link width with a vernier so you can get the master link somewhere near. On this chain it ranges between 10.36mm and 10.47mm.

I'm now lacking in pictures for the next steps due to juggling with chains, a ratchet and blah blah blah, but this is the crux of it.
Using the brand new link, you join your new chain to the old (we're not using the side plate so it will slide out if you release tension). I kept the vise grips loosely on my new chain to keep a little tension on it, and to prevent the new chain disappearing into the engine once it had gone round. Just leave it hanging down between the exhaust pipes until it's pulled round by the crank.
Holding the chain on the inlet side, keep pulling it up and collecting any slack as you turn the crank. Get all that? Keeping tension on both sides of the chain is the important part here. Turn the crank and just use the old chain to pull the new one through. It's easy as long as you maintain tension. Once it's through, zip tie both ends to the frame.

Now we flip the anvil part of the tool round so the pins can't be pushed through, and also the head so the side plate holder is facing the chain. On this tool it's magnetic so the side plate just sits there ready to be pressed on. It makes the job very easy.
The top part of the tool head with the V-shaped trough is for peening the pins over at the end. Again, it will bottom out before going too far and damaging the link. It slides off and flips over when needed.


Because the anvil prevents the pins being pushed out, and the head of the tool stops against the open side of the link, it won't push the side plate on too far. It measured at 10.55mm — slightly wider but nothing major. The plate with D.I.D. stamped on it is the new one.

With some of the results I've seen online, it's almost worth buying the proper tool.

Then it's time to put the crank back to TDC 1 & 4, refit the exhaust cam while making sure there is no slack in the chain between crank and cam. Count twenty pins and fit the inlet cam and centre guide. Release the screw holding the tensioner plunger a quarter turn, and tighten the locknut.

Turn the engine over several times by hand and recheck cam timing. Happy days.
Then it was time to put it all back together... or it would've been if I didn't have to replace a couple more threads holding down the cam caps. Ho hum.

And this is the old chain, 7-8mm longer than the new one. Another job off the list.


Helicoiling the cam caps coming next...
Thanks for a great explanation and good pictures, i feel exactly the same way about doing the chain correctly, and i want mine changed too. But i have to ask you, where did you buy that tool ? and what is the specific brand and name for it ? i have searched for it for weeks now.
ReplyDeletethank in forehand, Bjarne
Hey, sorry for the late reply. It came from a garage that was closing down, not sure if the manufacturer's name is even on it.
ReplyDelete