
There will come a time when, if you like to dabble with old vehicles, you will happen upon a damaged thread. And, to be fair, it can be an absolute bastard!
One minute you're tightening up a bolt into an alloy housing, the next the entire thread comes out with the bolt. And you usually only find out during reassembly and most of the work is already done. This is sod's law... par for the course... and a proper pain in the 'arris.
But there is a way. Fret not. You might not even have to strip the component completely if you know what you're doing, although that wasn't the case with this Trident:

We were working on this Triumph T150V a few years back. It was fitted with a big-bore kit and there was an oil leak from the head gasket so just a case of whip the head off, new gasket and away to go... in an ideal world. But Trident barrels have steel tubes which screw into the barrels first, and then the head bolts screw into those. No problem with that, but when torquing up the head bolts, one of the threads in the aluminium barrel gave way!
Much swearing was done, in one's quiet voice, and the head was taken back off. Barrels also off to enable a helicoil to be used and to ensure the hole was drilled out dead square. Of course, it's not a size that we had in stock so had to wait a few days for them to arrive and then we were back in business. Double length helicoils were used to ensure the steel tube sleeves wouldn't pull out again.
So, new base gasket fitted, barrels back over the awkwardly spaced pistons, and head back on. Torquing up the head nicely and another one stripped! Much swearing was done, this time in one's louder voice, and it all came back off again. Obviously this 850 kit wasn't as well made as the original barrels. This time every thread was drilled out and a double-length helicoil put in. Perfect in the end, and stronger too, but a lot of messing around to get to that stage.
The GS550E — camshaft cap bolts.
While doing the camchain on the old GS, I noticed some beautiful modifications to the camshaft caps using UNC bolts. Obviously the threads had been pulled, or damaged, and the previous owner used a much coarser-threaded bolt to get around the problem. It worked but I just prefer the right M6 bolts to be used. Because I'm only doing the necessities to get this bike running I'm going to leave them as they are but, when refitting the camshafts, three other threads gave way... I couldn't leave those.
So how do you repair a thread when everything's assembled?
Depends on the job, but if you've fitted a few where there's plenty of room, it's easier when you have to fit them in tight spots. The only real issue is cleanliness — all of the swarf or filings need to be removed before you finish the job.

One of the culprits.

First things first. The rest of the engine needs to be covered. We want to avoid any swarf disappearing down into the sump or oil ways.

Moving swiftly to the opposite side of the engine, this is how I do the repair. A lot of people will be kicking off about how you should never try this without removing the camshafts, or taking the head off. Simple really, if you're not confident, leave it. Bear in mind some people make their living from thread repairs that are in awkward situations.
Of course it would be nice if everything was removed to do the job, but that's not always a viable option.

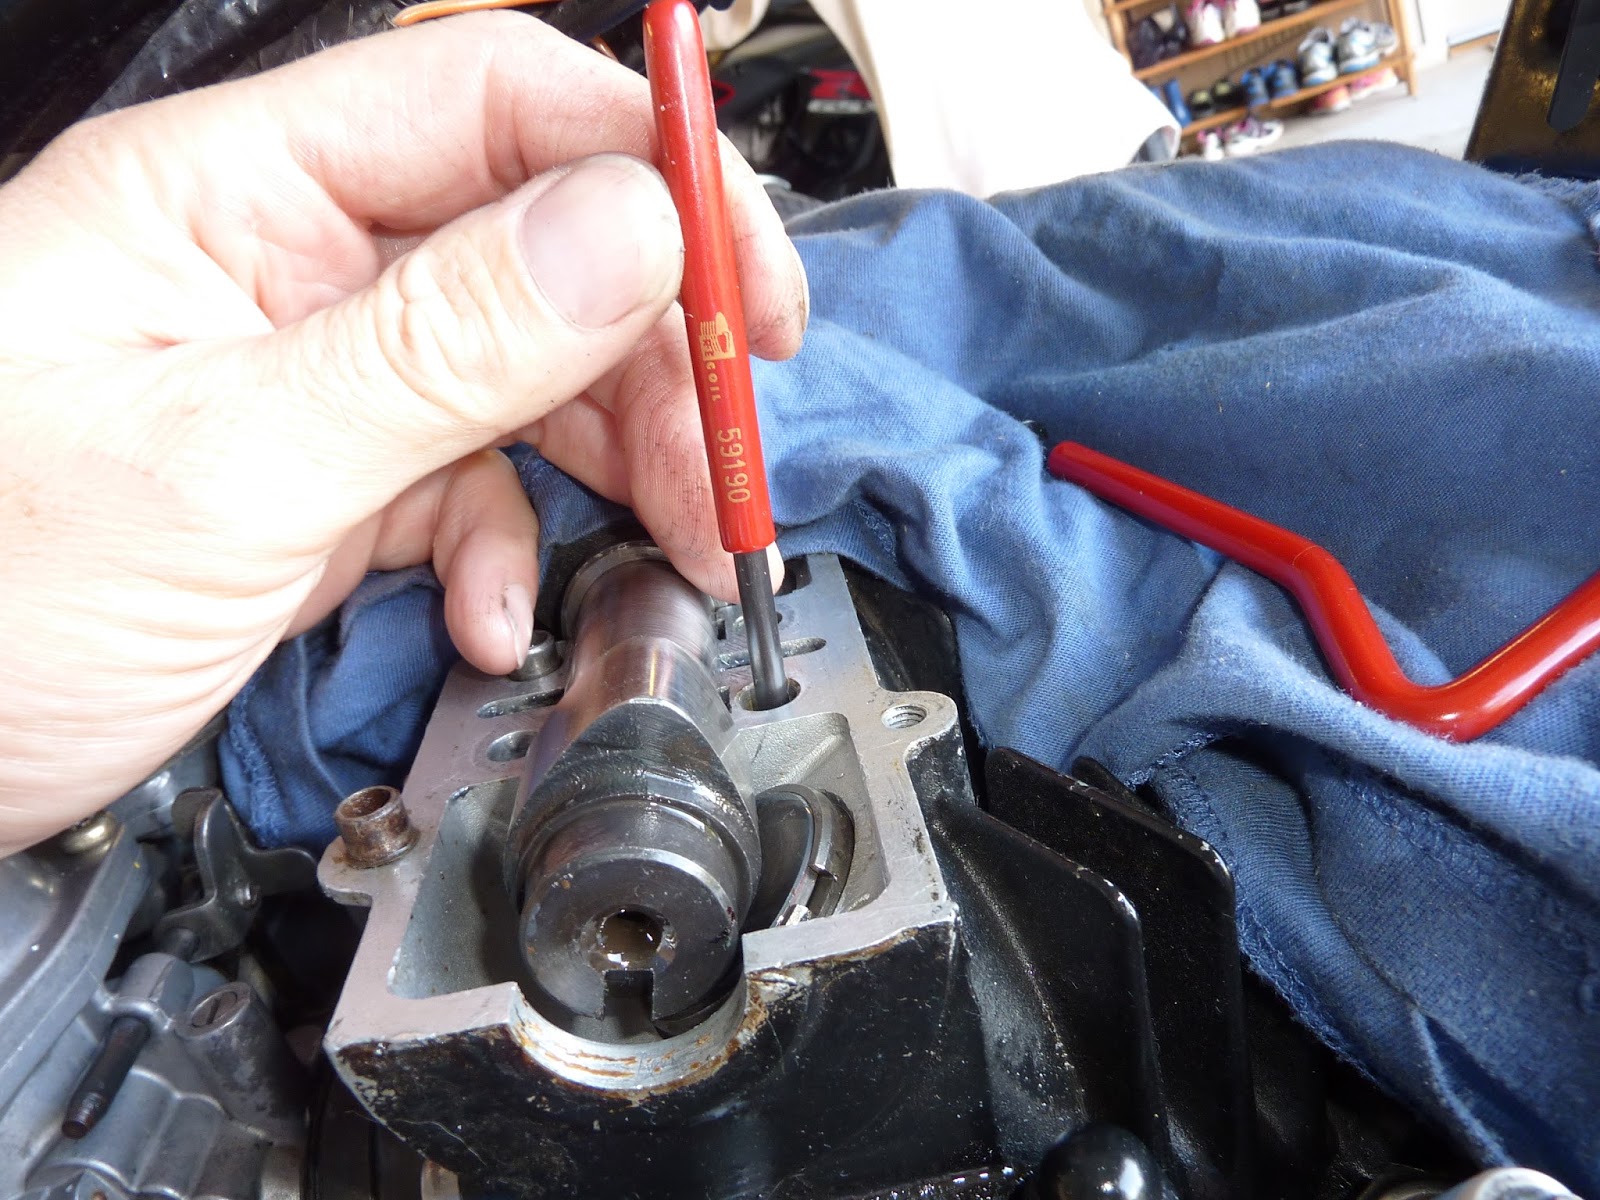
I always place a bolt in not of the other holes adjacent to the damaged one. This gives some idea on the correct angle needed for the tap. No need to drill the thread out here as it was already gone. The tap went in easy — make sure you go down far enough so that the taper of the tap is further down than where the helicoil will stop. If you don't go far enough the helicoil will get really tight on the bolt.
The tip for working inside engines! All oil ways are covered in grease to prevent swarf going in. It stops anything dropping into those hard to reach places. Messy, but very effective. An airline at the end is pretty much a necessity to blow out the filings and get everything spotless.


Screw it in, in this case leaving enough room for the dowel to go in afterwards, and you'll be left with the little tang inside the hole.


The punch supplied is to break off the tang. Just give it a sharp tap and it will break off into the hole. I use a tiny screwdriver with a magnet held onto the shaft to retrieve the tang.

Once turned over a few times, valve clearances were checked and adjusted again. The old GS is starting to come together. I'd ordered a couple of new Emgo coils, new plug caps, and points and condensers.
Happy to say it's sounding great with the new coils and plug caps, still a bit of smoke but we'll see how it goes when it's had a few runs. Once the points and condensers are in I'll balance the carbs.
I've just spent all weekend prepping the tank, front mudguard and rear cowl, just got to decide on a colour. I'm thinking blue or red...
No comments:
Post a Comment