
Every time you see a motocross, enduro, trail, or other off-road bike advertised for sale, it comes with those blanket statements. And what I've discovered over the years goes pretty much like this:
- It might not have been raced against other bikes, but it will have been thrashed mercilessly from day one by someone with no understanding of mechanical sympathy whatsoever.
- The "rebuilt engine" may indeed be completely accurate. It will have been stripped and inspected, parts priced up and found to be too expensive, engine subsequently rebuilt, with the old parts, and bike offered for sale as soon as an ad can be written. Now, if you're very lucky, but don't hold your breath, the "rebuilt engine" may come fitted with brand new gaskets. Ooh!
- The age of the bike, and monetary value to the owner, is uber important. It's the difference between regular oil changes and a clean, oiled air filter, and a black sludge, full of metallic particles, semi-circulating around the engine, with broken bits of dirty foam floating around the air box where an air filter used to live.
It is that simple, and brings me neatly into todays little job. The bike, an XR80A, isn't actually for sale; it was given to a mate to use but, before he does, wanted to get it looking good, and running properly. So, he says to me, "I'll clean and paint the rest, but the engine just needs a new head gasket, it's leaking oil".
Yep, all that's wrong with it - so, whip the head off, replace the head gasket, check the bore while it's apart, just in case we want new rings etc. and slap it back together. It's a walk in the park!
He brought up the big plastic container with said engine inside, and various other bits. And... well, there's the carb and air filter. Just a dirty steel gauze left to stop the odd house brick floating through, no foam element left. Tidy.
He brought up the big plastic container with said engine inside, and various other bits. And... well, there's the carb and air filter. Just a dirty steel gauze left to stop the odd house brick floating through, no foam element left. Tidy.


I started with the carb. A quick wash and strip revealed it to be in pretty good nick. Lovely jubbly.


The throttle cable had seen a bit of strife though, and will need replacing. The outer is damaged in two places and not allowing the inner to move freely. Stuck open throttles aren't much fun for adults, let alone kids, so that's one area that needs to be fixed.

The gear lever has seen a repair or two.

The old Jubilee clip holding the crankcase together trick - nice. Hashtag that my friend!

The chain's obviously done one at some point in this bike's career, and totalled everything around it. The semi-circle around the sprocket is made up out of bathroom sealant.


And into the great unknown, just needs a head gasket, just needs a head gasket...

Nice and simple layout, Honda do make some cracking little charms.

Timing marks - T for Top Dead Centre, F for Fuc... Fire, obviously.

With a paint dot applied to the cam sprocket, and both M6 bolts removed, the sprocket was removed. Not entirely sure how the chain tensioner works at this point. There's an eccentric adjuster at the top, and a spring-loaded device at the bottom. The rocker gear is held by the head studs - three 12mm nuts and one 13mm are the signs someone's been in here before. With that removed, there's just one M6 bolt on the outside of the head to be removed, and it all slides off.

Yes, it's that easy. The piston is very clean considering, and at this point I think it's worth getting a set of rings for it.

With a circlip removed, the gudgeon pin is slipped out, but it's very worn! A ridge is seen and felt, so not only does that need replacing, but the conrod's small-end is bound to be worn too.


An ART 47.5mm piston. Is that a standard bore?

Oops, forgot to mention the camshaft. Scored and worn, and the shells in the head are in a shocking state! Happy days, I'd read about issues like these on Thumpertalk.


Chain wear marks in the cam chain tunnel. That can only mean a guide has broken up in the past and allowed it to wear away the alloy.

Conrod and crank, and the cam chain.

The cam chain tensioner, more about that little mechanism later.

No ridge as such on the bore, which is good, but pushing a ring down squarely (use the piston to push it down) and measuring the gap will give you an idea of wear. This one has a 0.019" gap which is close to wear limits, from what I've read online - and the less said about reading facts online, the better.


With slight play detected in the main bearings (grab the flywheel and try to rock it up and down while holding the engine) it was time to check the big end. Put a feeler gauge alongside the thrust bearings to prevent side play, and try to move the conrod up and down. If there's definite up and down movement, it's time for a conrod kit, or complete new crank. And yeah, there's a bit of up and down on this one.


On closer inspection of the piston, but more so the circlip still fitted, it appears to be bent out on the ends. I'm assuming it's been damaged previously as the other one fits into the groove perfectly.

The cutaway for the exhaust valve is also deeper than the inlet, which doesn't seem right. It might've been fitted the wrong way round, but maybe it's just one of those things, as I can't actually see any indication of direction at all. What happened to a good old arrow on the top with 'standard' or oversize dimensions on it?


One area that gets neglected on engine rebuilds is ye olde humble dowel. Sometimes burred, scarred by Vise-grips etc., it's worth checking them to make sure they slide into the barrel (jug if you're American) and head nicely.
If they snag or bind in their respective holes, it could give you a false reading when you torque down the head bolts etc. I've seen a two-stroke barrel leak on its base gasket because of this.
Don't squash them! Gentle pressure and turning motion, with a pliers, and they were out for inspection. Cleaned up in the vice with emery cloth soon as them looking like new. I had to clean up the holes in the barrel and head slightly too because of corrosion, burnt oil etc. and then they were sliding in properly.

Nice, pedantic maybe, but nice.

And while the dowels are out, use the opportunity to properly clean the gasket material off - it makes it so much easier. If in any doubt on how clean to get it, think what it would've looked like from the factory. Any lumps, burrs, screwdriver marks etc. should be cleaned and dressed now.
I knew someone who left small lumps of the old head gasket on a Norton head once, thinking the new head gasket would "take up the gaps". It won't. It's got enough to do with sealing the combustion chamber, and keeping the oil in the right places without having to seal imperfections left by you.
I knew someone who left small lumps of the old head gasket on a Norton head once, thinking the new head gasket would "take up the gaps". It won't. It's got enough to do with sealing the combustion chamber, and keeping the oil in the right places without having to seal imperfections left by you.

Doing all this was probably overkill on this engine, but it gives you an idea on what you should strive for.

Yes, they are usually hit and miss. Don't think you've been singled out when they don't fit, you're not the chosen one. In this case, the base gasket didn't have larger holes cut out for the dowels (maybe they expect you to throw them away), so out with the trusty hole punch to put the right size in. Don't be tempted to force the gasket over - it'll rip, or raise up around the bottom of the dowel, and increase the chance of leaks.


They're never perfect, this one sits slightly proud in between the two dowels. Another smidgen taken out with the hole punch and all was well.


Funky camchain tensioners.
So, a rod connected to the bottom side of the guide slides up and down in the barrel and is pulled up by a spring. The locking screw at the bottom stops it moving once set.

This pic shows the top of the rod and the spring. The top part of the guide (which has fallen to the right in the pic) is held by an eccentric adjuster in the cylinder head.

I'm fitting it with guide pulled down as far as possible and locked in place with the screw. The cam chain has a zip-tie on it so I can pull it up though the camchain tunnel later. I don't have any pics of the piston/ring insertion because I was using both hands to do it - no double entendres please!

Ok, so barrel pushed down and seated nicely, front guide refitted and the zip-tie (attached to the chain) is poking up too. The head gasket is a bit of a hit-and-miss affair, but so's this whole rebuild. It would have been nice if they could've lined the holes up, especially where the piston goes up and down, but you gets what you pays for.

It's very nearly in the middle!

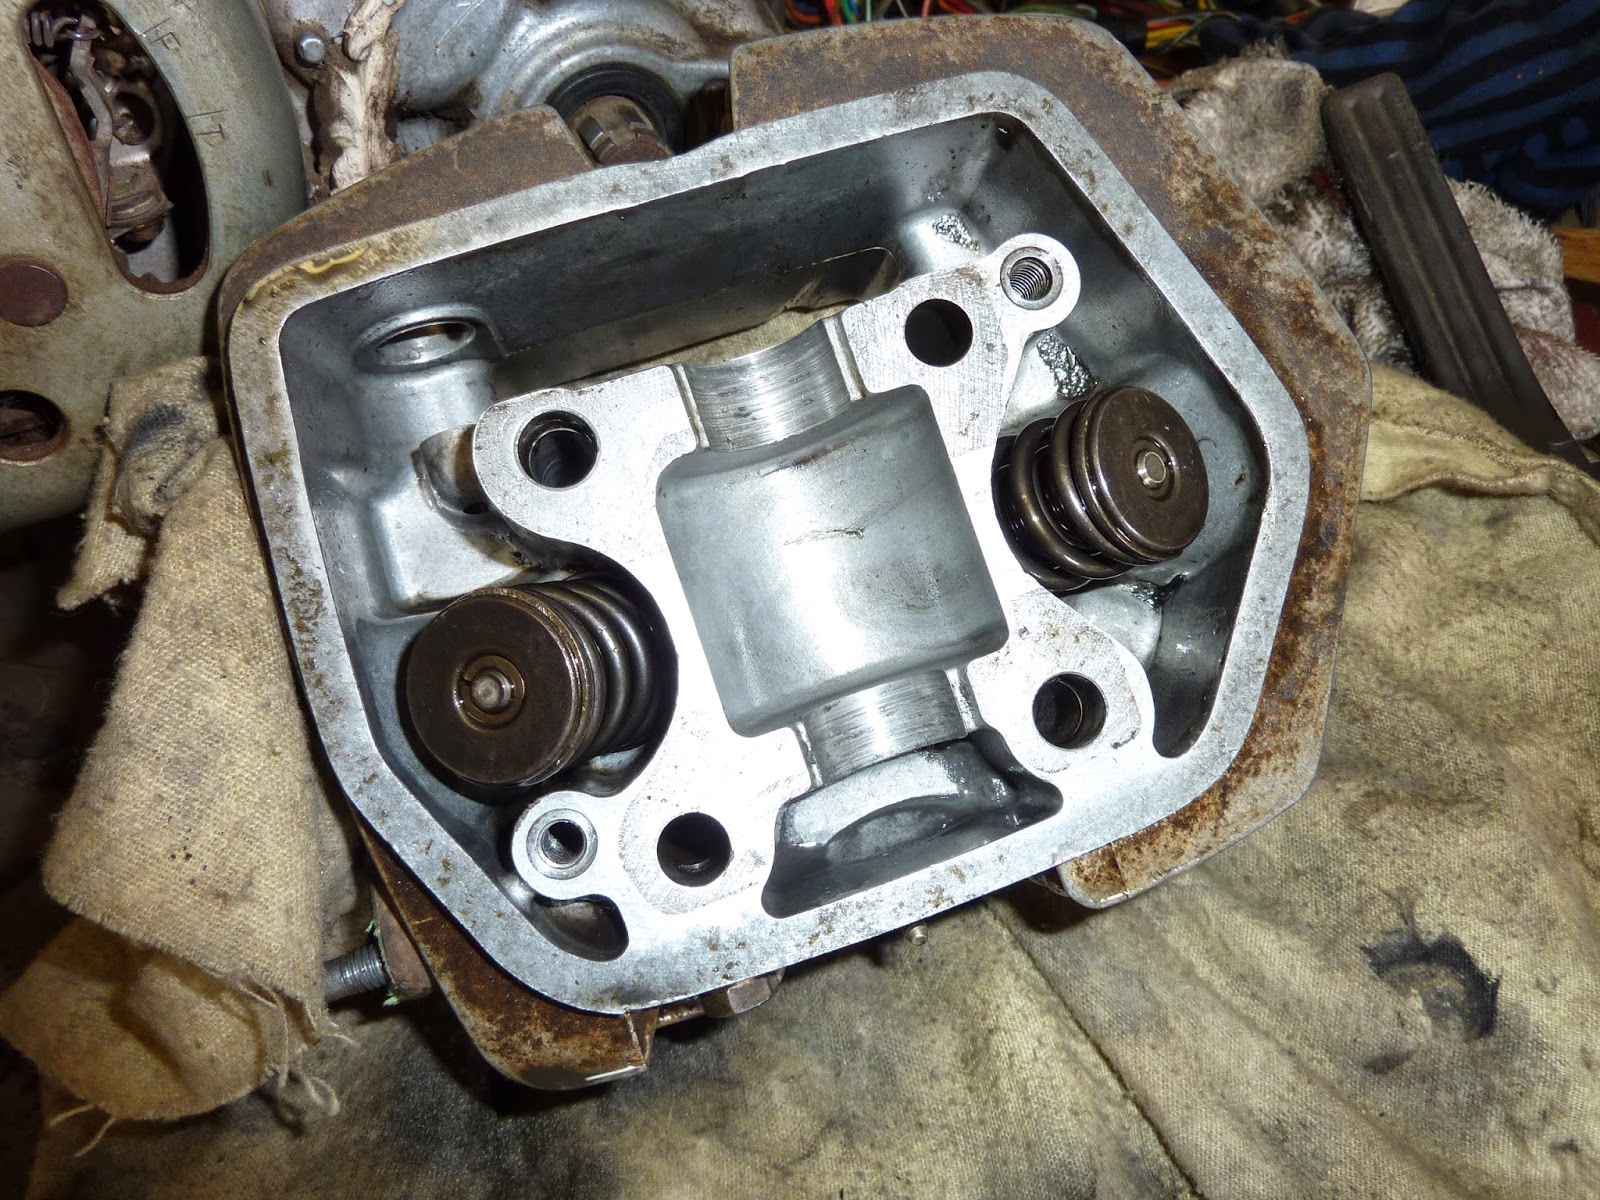
Time to clean out the old oil/gunk from the head. The camshaft journals are scored badly, but are at least replaceable should we ever go that far.

Then the head was refitted, camshaft and rocker gear back on, and nuts torqued down. Cam timing was reset and chain tensioned - and this is how Honda say to do it:
1) Set the eccentric adjuster in the head so that the slot is upright (see pic).
2) Undo the screw and locknut at the base of the barrel to allow the spring to pull the rod upwards. This forces the guide out, and into the chain.
3) Lock the rod by turning the screw in, and then tighten the locknut. (I would now turn the engine over a couple of times to make sure timing marks line up, and let the rod go again in case there is any slack left in the chain.)
4) When you get the engine running, if there's any noise from the cam chain, loosen the locking plate on the head and turn the eccentric adjuster either way until the noise stops, then lock the plate again.
Job jobbed!


With valve clearances adjusted (recommended 0.002" for both valves), it was back on with the rocker cover.

Not entirely sure which way the inlet manifold goes (it was fitted the other way round before), but it'll have to come back off before fitting in the frame anyway.

Right, that's about it for today. We can but wait, and see what happens when it's all back in.

Thought of the day.
Old off-roaders are a labour of love. Don't ever buy an old 'un and expect it to be good on the inside. Anything that's put through all that dirt, crap and water is going to suffer. Look after one from new and maybe it'll be ok, but neglect it and it all gets a bit expensive.
No comments:
Post a Comment