
Not sure if it's different for the female fraternity, but when a geezer says there's a problem with his bike, it's immediately classed as an excuse. Always has, always will be... and hell, I'll admit it, I've used it a fair bit too.
And so it was with Dave's Superduke. Ages ago he said it didn't feel right, "It's like the front tyre is sticking to the road at really slow speeds." I thought no more of it, after all, it only ever goes at really slow speeds. Boom boom!
I had a ride on it back then, but hey it's a Harley, sorry V-twin, and didn't really feel out of the way. But a few months later, yes just last weekend, we went out for a blast and he pulled over and asked me to ride it again...
I got thirty yards and thought 'What the f*#k!'
This thing has become very dangerous. Slow speeds, or under engine braking, and the steering went horribly tight. With throttle whacked open it was good, but as soon as you caught up with a car and slowed down, it felt like the steering was about to lock up. Kudos to Davy for riding it like he was.
Symptoms?
When steering bearings wear, they become loose and pitted/notchy. Because of the weight of you and the bike on the lower steering bearing, once facing straight ahead, the steering effectively locks into that position. Think of it like the spring-loaded ball in a ratchet and how it pops out when you fit a socket on to the drive. That's what happens to the bearing rollers, or balls, as they drop into little dents in the outer race.
From the rider's perspective, he/she now needs more leverage to move the handlebars from the straight ahead position. That's easy enough, but you find yourself having to put more input into the bars initially; then, as the bearings move out of the recess they were stuck in, the steering suddenly goes light and you're pushing the bars far further than you wanted. We're very adept at adapting (ooh, hark at him!) to these situations, but having to constantly counteract for these situations is a pain, and also dangerous.
If in doubt, get someone to pull the bike over onto its back wheel and side stand, and go from lock-to-lock using the fork legs. You should feel the tight spots as you go back and fore.
Still not convinced? Or inexperienced? Then get help from some who knows. Steering is pretty important on our two-wheeled bundles of joy, so make sure it's right.
And back to it.
So, a complete bearing/seal kit was purchased from Action KTM, in Nerang, for the very low price (I thought) of $89. That's pretty good considering they're SKF bearings, and today we set into it.

The big Katoom is only just out of warranty too, so if you're feeling something strange, get it looked at while you can.

The mudguard/fender is held on with six M6 Allen bolts and will come out quite easily without even touching the wheel.

The headlight and instrument cluster is held at the top by two M6 Allen bolts, and then hinges down. Great idea by KTM. You can disconnect all wiring safe in the knowledge the light isn't going to fall on the floor and get scratched.

I'm a bit of a stickler for things going back exactly as they came out. It doesn't always work, but pics of the loom etc. help when you put it all back on. When I've worked on something, I don't want it to look any different from factory afterwards, but that's just me.

Although hard to see, there are two pivot pins at the bottom of the headlamp, held with spring clips. Slide the clips off and the headlamp/instrument assembly can be removed easily.

To leave you with this.

Calipers are held on by Torx bits, and a 12mm Allen key is needed for the wheel spindle.

With the four pinch bolts slackened, the wheel spindle just glides out... almost.


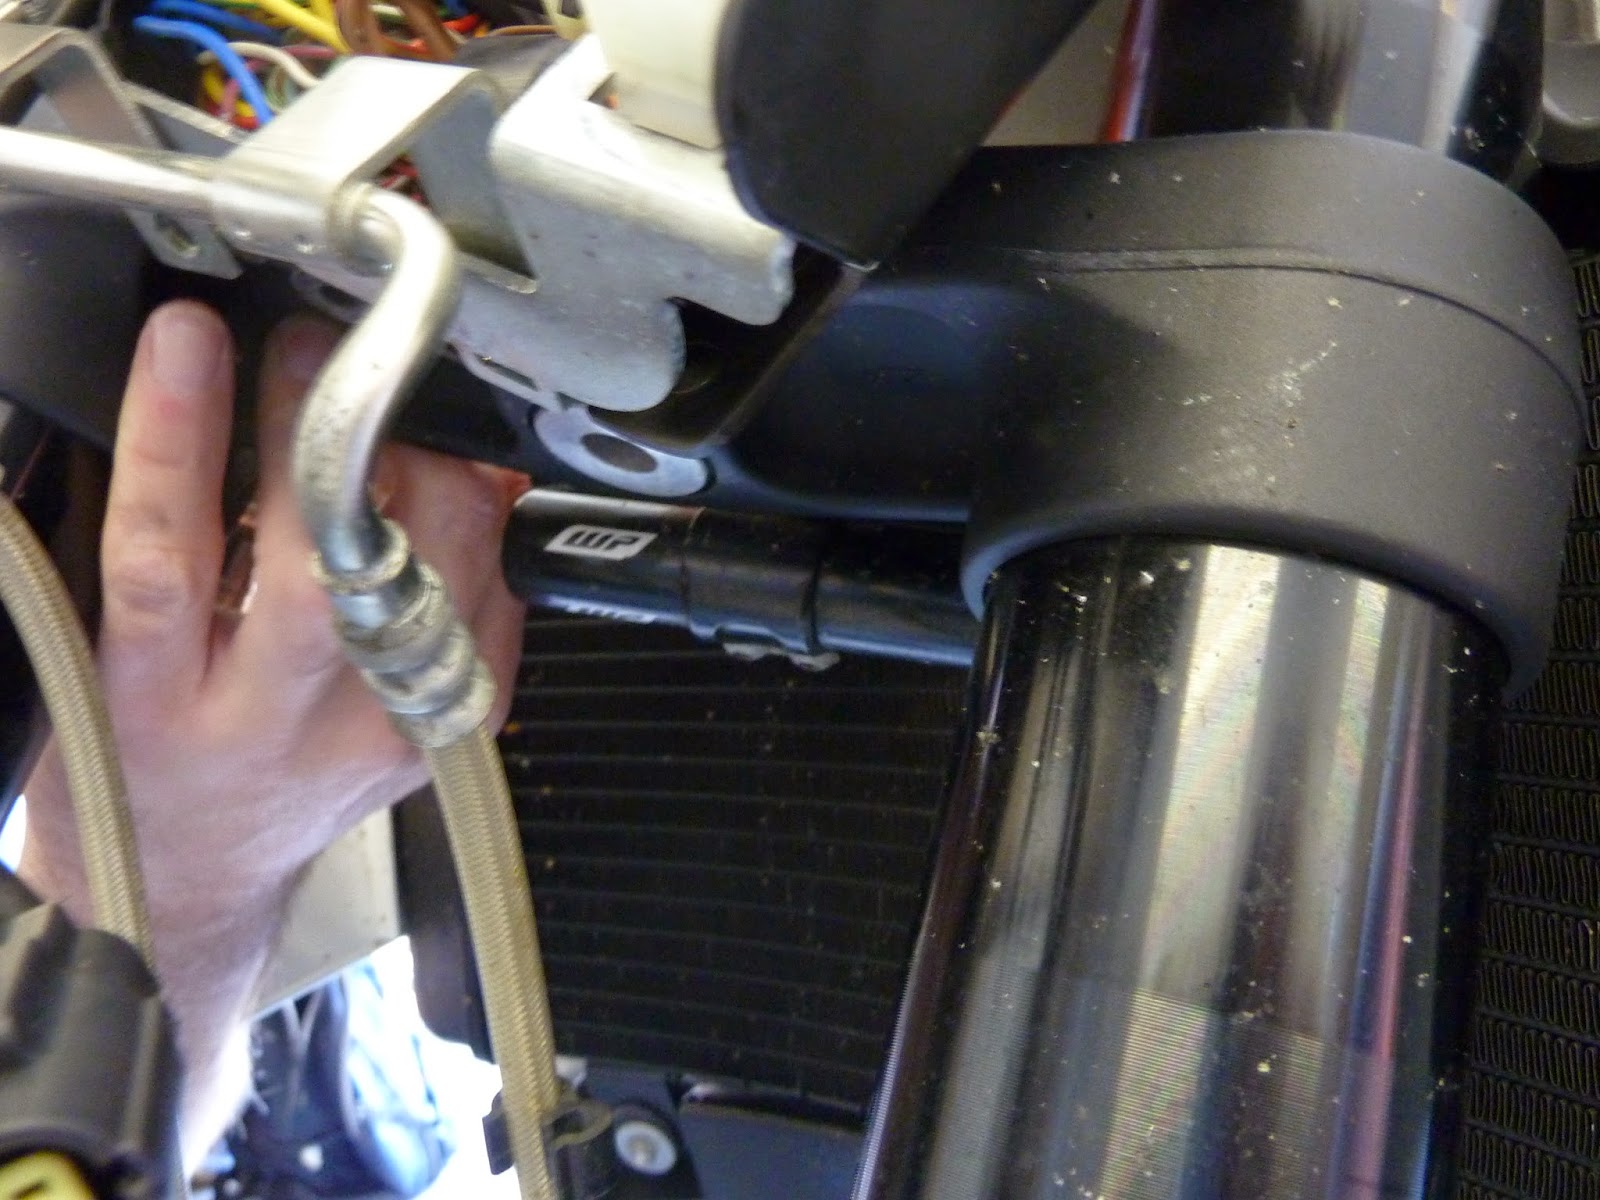
The steering damper is bolted to a separate clamp above the lower yoke/triple clamp. With this bolt removed, two 4mm Allen bolts clamp the damper. Slacken those two and it slides right out. It's probably advisable to get it out of the way as early as possible because if you go lock-to-lock with it disconnected, it'll go through the radiator.


In the picture below, I'm pointing at the brackets for the brake lines and wiring. The headlamp pivot bracket goes underneath the yoke, and bolts into both of these. Further back you can just see the heads of the steering damper clamp bolts.
Now the bike needs to be supported. There's not a lot of room under the engine on the Superduke, but with a couple of well placed blocks of wood we got it pretty solid.
Next, the three bolts on each fork were slackened, and then removed. On the right fork you'll have to loosen the steering damper mounting clamp too.

Handlebars can be removed with everything left intact. We zip-tied it to the frame and placed a table underneath the front end for the calipers to sit on. With nothing attached to the the triple clamps, you can feel how bad the bearings actually are.

The 27mm bolt on the top of the clamps comes undone very easily and, to my surprise, the bottom yoke starts to drop out as soon as the top one is removed. No adjusting collar fitted to these? Never seen that before. I think every bike I've ever worked on has had an adjusting collar first, than a lock nut on top. Very strange.

So there's your problem, water has been in there and what little grease there was has been washed out. Not good for three years old.

The top bearing is still in good condition, although the grease is a little bit emulsified.

That is horrible!

To get the lower bearing off the steering stem, I first break the cage to remove the rollers. A screwdriver or side cutters will soon destroy that.

Now it's time for the angle grinder. The idea is to gently grind through the inner bearing without touching the steering stem itself. A little bit at a time folks.

To leave you with something like this. Support the stem on a block of wood, get a large, sharp chisel and give it a good whack. If you're close to getting through the bearing with the grinder, it will crack open easily.

Sorted. It will now pop off with a few gentle taps. Just support the stem again and hit the lower washer/seal with the chisel. Clean up the stem, make sure there are no burrs etc. and you're ready for the new bearing and seal.

Official kit.

With plenty of grease underneath the washer too, I start to reassemble.

It's a matter of preference, but we're using Optimum Choice grease. It's fully-synthetic and sticks like the stinky stuff to a blanket.

New bearing is protected by the old one. Now you can use a long tube, or punch, to hit the bearing on. If using a punch, go round the bearing so it goes on evenly.

Now plaster the bearing in grease. Turn it and keep applying, you need to work the grease right into all the rollers. When it's full, you'll feel it getting stiffer to turn.

Shiny, new bits always look good. The old cups were relatively easy to remove with a long, round bar (I just used the old swingarm pivot from the GSX750). As you can see in the pic below, there's plenty of lip around the bearing for the punch/bar to hit on (you don't have that luxury on some bikes). Just work evenly round the bearing so you don't spread the frame tube.

Plenty of grease slapped in before the bearing.

And that's the top one in place.

Plenty of grease on the steering stem too because we don't want anymore corrosion in there.

The bottom yoke reinserted, and the new top seal on the frame.

Reusing the old black cap because the new one was silver and Dave likes things to look right :)

This, for me, is where the weirdness comes in. The top yoke is refitted with the 27mm headed bolt, and you set the tension by torquing up to 12NM. Then the pinch bolt in the yoke is tightened up, and that's it. No adjusting collar. It obviously works and is very simple, but it just feels like I'm missing a very important part on my steering.

And from there we chuck it all back together. Here's the expensive little steering damper before Dave cleans it all up. While it was all apart I also removed the swivel mounting to clean and grease the rose joint. With this removed it also makes it easier to tap in the lower steering bearing.

This is the steering damper mounting. I have to hand it to Dave, he took a few good pics today.

That's the headlamp bracket bolted back on to the bottom yoke. As mentioned before, those two bolts also hold the wiring bracket and the brake lines.


There's a couple of scratches on the fork stanchions, so I got Dave to pull the dust seals down and clean them out. Any dirt lodged in here will scrape on the forks and also let oil through the main seals. Hopefully all good now.

Brembo caliper with four separate pads. Could do with a wash to be fair, but that's for another day.

Wheel refitted, calipers on. Nearly there!


The verdict.
Dave came back happy, the steering now feels incredible and he said he never remembers it being that good - might have to do something to slow him down then. After a ride it's a good idea to check for play anywhere as bearings 'settle' in, and recheck all your bolts again. Hopefully I'll get out on it tomorrow and feel the improvement.
Next job on the cards is to remove the swingarm, the original smear of factory grease has probably long gone...
No comments:
Post a Comment