Tidying up the wiring...
So far, the most painful part while knocking up the streetfighter has been the wiring or, more importantly, where to hide it. While also making it look tidy and functional. Where the manufacturers have loads of room within a fairing to put everything neatly, we need to move it somewhere else.
Traditionally, the headlamp shell would hold a fair section of wiring, but my LED light is pretty chunky and I'm guessing it's going to run quite hot with the huge heatsink on the back of it - I'll keep an eye on that.
There seems to be a fair bit of room under the airbox (above the engine) so I'm putting what I can in there. I'm also moving two relays under the seat along with the fusebox, purely for ease of access. The fan relay can stay under the airbox. I'll keep the headlamp fairing loom intact with all plugs so it can be put back to standard at a later date.
There was a lot of love needed to repair the loom initially because of those dirty rats! Incredibly, everything seemed to work out well.
Once I knew everything worked ok, I made a start on rejigging a few things here and there. The horn could sit under the bottom yoke, switch wiring was just about long enough to clear the the steering on full lock, and I checked under the airbox for available space.
The loom was thrown in and moved here and there to see if it would work. Once I was happy with that, I cut out two relays and the fusebox, lengthening the wiring so they would sit under the seat.
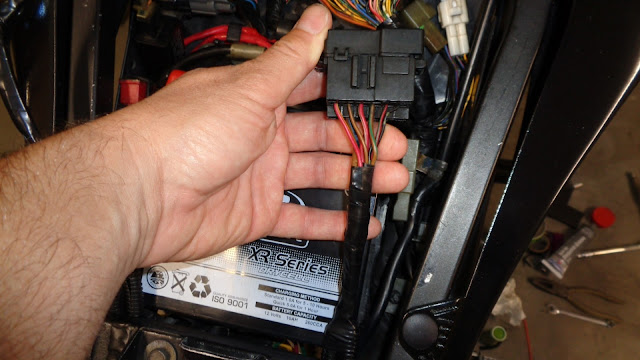
All wiring joints have been bared, butted up and pushed into each other, then soldered to try and keep the join neat and small. Heat shrink is then applied.
The pic isn't the best, but something along those lines.
Solder joints can be a bit fragile in areas with lots of vibration. Personally, I always try to tape them together and maybe insulate them with foam if you think they will move/vibrate.
Crimp connectors are better and more reliable for this application but take up more space. This might just bite me in the ass in the long run - even though the wiring has been secured to other parts of the loom and taped up - vibration does funny things.
That's the fusebox with extended wiring attached, this will now sit under the seat. I've covered all extra pieces in flexible armour, and they run through the same clips in the frame as the standard loom.
The two relays come down on the right side of the frame. Again, these are armoured and go through the original wiring clips attached to the frame.
The foam is there for protection against vibration and the heat from the coolant pipe.
Admittedly, it is becoming a bit of a jumble under here now. Every part of the original loom still exists and can be put back to standard relatively easily. Who knows when I might want it to be a fully-faired R1 again?
Looks much better without all that wiring at the front now.
The final piece of the puzzle is the indicators. For the rears I had to bend an extra piece of flat bar to go behind the number plate/tail tidy. The integrated tail light was orignally meant to be the indicators so this tail tidy had nowhere for them to bolt to.
For the fronts, I need something in the headlamp brackets, but there's nothing on these short ones!
I had a small sheet of black perspex hanging around in the garage, and gluing two bits together would give me the same thickness as the brackets. I wonder...
Glued and pilot holes drilled.
Out to 10mm, the paper keeps things nice and shiny underneath.
And they fit a treat, with a tiny smear of Araldite to stop them moving, they can be tightened up. Perfect.
With a new relay fitted to allow for LED indicators, they were flashing like a bought one!
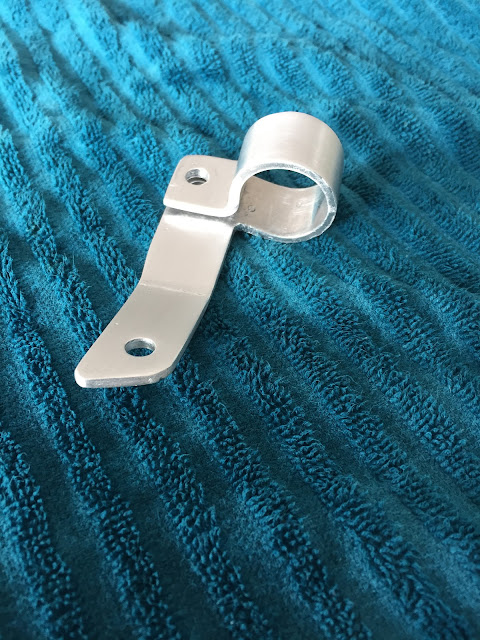
The last step was to make a bracket to hold the brake fluid reservoir. With a bit of jiggery-pokery, some aluminium flat plate, and a cardboard template, I had something which would do the job. Finally, the R1 Streetfighter is ready!
Then a slap of the old caliper paint (it dries quickly), it was ready to rock.
Paint chipped as I bolted it, but I'm sure we'll all survive. It now needs a test and get it on the road.
Back to the start...
Really happy how it's turned out.
More soon folks!


No comments:
Post a Comment