Showing posts with label Yamaha. Show all posts

Tuesday, May 16, 2023

Yamaha FZ750 Restoration - Suspenders and Fast Rides.

Cracking blast today!

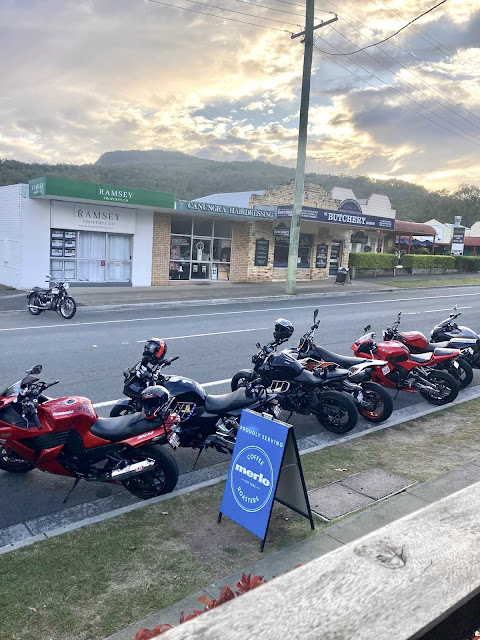
I'll digress at the start of the blog today. I'm having a great day! We all met up early for a fastish blast this morning and the 2002 R1 got to pit itself against a much-too-loud 2014 S1000RR (running 196BHP at the wheel). We also had a ZX14R, Diavel, CBR600RR, CBF13000, and an MT-07. She, the R1, limped home on three cylinders in the end but really did herself proud. 

Sunday, April 16, 2023

Yamaha FZ750 Restoration - The Shock Absorber


 Originality...

The original shock on the FZ, as could be expected, was well and truly past its sell-by date. I would have loved to use the original but I also want this bike to handle as well as possible without the costs associated with Ohlins etc. 


Finding another original shock in good condition has been challenging so far but you never know what might turn up one day. So, to allow me to carry on reassembling, I again spoke to Paulo at Motogenn and bought one from a low-kilometre 2018 Ducati Monster 821. This one was chosen as it is the same length so hopefully not too many alterations needed. It's made by Sachs and should be far superior to the original anyway, not to mention lighter.

It looks absolutely mint, and now requires a slight rejig to fit the original mountings of the FZ. No easy task as the shock has rose joints to suit an M10 bolt, whereas the FZ has an 18mm pivot pin running through the lower mount. The top mount is an M12 bolt but, with spacers in the top rose joint removed, the FZ bolt is a perfect fit. It just needs some spacers to maintain its central position.

I pressed out the lower bush in the vice, and started measuring.

The bushes in the original FZ shock appear to be Teflon-coated, like fork bushes, so I made a puller to remove them for inspection. They look great so I will make a steel bush to fit the lower shock eye, fit the bushes inside and finish it off with some spacers to keep the shock central and prevent any wear occurring against the aluminium bracket that the shock is mounted to. 

This is the steel bush that will go through the bottom of the shock. The original bushes will be pressed inside. I'll probably fit a grease nipple to the pivot pin so I can grease the bearings to keep dirt outside. More on that later.

The bushes were drawn in using the puller I made earlier and worked a treat. I also made end caps to fully support the thin bush when the pivot shaft is fitted. These will also prevent any wear to the aluminium bracket.

There is the new main shock bush with Teflon bushes inside. Those are the two end caps to keep everything central.


This is how it will fit inside the monoshock bracket under the swingarm. The pivot pin slides through and has a circlip fitted for safety. The two M6 clamping bolts prevent any movement.


And finally with shock mounted. The Teflon bushes are smeared with a light Lithium grease when assembled. I was going to add a grease nipple to the end of the pivot and drill three small holes along it to grease the bearings when I wanted to, but the shaft is hardened, as expected, so I will leave it alone. 


That's the puller for removing and refitting the bushes with no damage whatsoever. Worked perfectly.


Ok, will post more when the swingarm is mounted.

Friday, January 27, 2023

Yamaha FZ750 Restoration - Burleigh Powder Coating.

The Frame is Back!

True to their word, less than a fortnight later and I got the call that it was ready to pick up. I was slightly apprehensive due to the fact that the rust was pretty bad, with heavy pitting. When you don't get to see what's left after blasting, it's always a worry. It's not cheap either. 

Would I have been better off with a wire brush in a drill and using aerosols? 😟 That would have taken forever as it's a big, complex frame. And the results are never the same when spraying a frame, overspray always dulling one side etc.

The powder coating on the BSA frame is still superb after thirty years, so I'd pretty much made my choice.

First, a wee recap. She was looking a little worse for wear...


The photos actually make it look far better than it was. Brake fluid had taken paint off in some places, rust had started taking over everywhere else. The centre stand looked like it had been dragged up from the Titanic.

Monday, January 23, 2023

The Yamaha FZ750 Restoration.

Blown away...

Carlsberg don't do projects, but if they did, they'd probably be the best projects in the world. Quite frankly, if a restoration project could be ideal, this one could well be it. Admittedly, the plastics are a bit rough, but mechanically she's proving to be pretty good.

After getting the engine running, the bike was quickly stripped and put into boxes. From here I will take pics, and start on individual components. If I get a bit fed up with doing one thing for too long, I'll move on to something else to break up the monotony. It's easy to get overwhelmed when stuck on a time-consuming part.

Anyone who has pulled old machines apart would be familiar with stripped heads on screws and bolts, especially when some of the bike is as rusty as this one. But, as corroded as every fastener is, everything came apart like it was put together last week! It's been surreal.

I had noticed play in the front wheel during the strip-down and was pretty shocked to find this. 

Sunday, October 23, 2022

Repacking Your Can, Exhaust, Silencer or Muffler.

Shut it! I can't...

Before I start, I love quiet pipes, and wish I had the standard can for the R1. Better for my ears and attracts a lot less attention when you're bouncing off the limiter. The Bandit has quite a nice deep tone with its db killer in, but the R1 was a little more raucous. Time to repack it.

With a little research done, I've been hearing good things about Acousta-fil fibreglass packing. Not cheap, but worth it if it lasts a few years.

Here's the Australian-made Screaming Demon can that was fitted to the bike when I bought it. A little long by modern standards, and takes me back to the Hindle pipes of the nineties. It's good quality, but I want rid of the main badge and will rotate the can so the small maker's badge at the bottom is hidden around the back.

Tuesday, January 4, 2022

Yamaha R1 Streetfighter - Wiring To The Finish!

 Tidying up the wiring...

So far, the most painful part while knocking up the streetfighter has been the wiring or, more importantly, where to hide it. While also making it look tidy and functional. Where the manufacturers have loads of room within a fairing to put everything neatly, we need to move it somewhere else.

Traditionally, the headlamp shell would hold a fair section of wiring, but my LED light is pretty chunky and I'm guessing it's going to run quite hot with the huge heatsink on the back of it - I'll keep an eye on that.

There seems to be a fair bit of room under the airbox (above the engine) so I'm putting what I can in there. I'm also moving two relays under the seat along with the fusebox, purely for ease of access. The fan relay can stay under the airbox. I'll keep the headlamp fairing loom intact with all plugs so it can be put back to standard at a later date.


Wednesday, November 17, 2021

Yamaha R1 Streetfighter - Repairing Bodywork

 The Tailpiece...

Finding a secondhand tail for the R1 was becoming a pain. Cheap enough in the States, rocking horse shit out in Oz. I decided to give repairing it a go. It was cracked in several places, missing a chunk of plastic just under the seat, and both mounting brackets were broken off and missing. Not a good start, but not impossible.

I'm not a huge fan of plastic welding on fairings — I haven't come across a really strong weld yet — but am open to it if someone can prove the join is stronger than the original section. I am going to superglue the cracks shut, then fibreglass behind them. Yes, fibreglass is messy, but extremely strong and durable. With a light skim of filler, I'm hoping to get away with it.

The pointy bit under the seat will have to built up first in fibreglass, then shaped with filler. I consider this to be skill-building, and I need the practise with filler anyway.


Tuesday, September 7, 2021

Yamaha R1 — Project Streetfighter.

I love a bargain... or punishment!

Gumtree and Marketplace are taking up my life. Both sites are out of control! Where commonsense once led the way, I keep asking:

1) Do I need another project? No, I have too many, walk away now.

2) Do I need another project? Of course, one more wouldn't hurt.

After all, I could sell something to make more room...

Streetfighters.

I've always wanted the genuine sportsbike version, with all the proper kit from the period - suspension, brakes etc. - but never felt like ripping the fairing off a perfectly good bike. So I kept my eye out for something that maybe didn't matter. Something that hadn't been looked after in the first place and either needed new fairings, or a new look altogether.

So what is it about the older sportsbikes?

They're old school cool, and aggressive. Making good power, proper suspension, with handlebars and no fairing. What's not to like?


Saturday, January 19, 2019

Improving Your Motorcycle's Brakes... Cheaply.

As the lever fades...
With a few miles, or years, under its belt, most bikes start to feel a little bit lacking when it comes to the feel at the lever. And I, for one, am not keen on riding bikes where the lever almost touches the bars. Now, if money is no option, there are plenty of easy fixes:
  • New discs and pads
  • Braided brake lines
  • Rebuild the calipers with new seals, maybe pistons if damaged
  • Brembo adjustable master cylinder 
But this gets expensive, and changing parts could be masking an actual problem — something that could be easily fixed. So what if you could improve your standard brakes where things have deteriorated over time? Well read on...


Friday, July 29, 2016

Yamaha MT-07 First Ride.

A wise man once told me...
That fifty brake horsepower was enough for the road. And I agreed with that... to an extent, but just like forty years-old is the new thirty, I think 70BHP could be where the real fun starts. 


With 200BHP on tap now from the big sports bikes, big power is becoming slightly irrelevant — yeah, people were saying the same when 135BHP was a big number. But you can't get the power down without using drive-modes, traction control, wheelie control etc. It's hard work stopping them, turning them and can be very embarrassing when little commuter bikes make short work of them through the twisties. 

Thursday, July 21, 2016

Yamaha MT-10 First Ride.

Transformers, or bikes in disguise?
I guess I wasn't that impressed, initially, with the photos I'd seen of the new (all-conquering?) Yamaha MT-10. It looked too big, and the headlamp assembly/bikini fairing all seemed a bit out there. Definitely a move away from its simpler, smaller siblings, the MT-09 and MT-07.


So when a good mate of mine brought his brand new (just delivered) bike out for a blast on the weekend, I was surprised how good it looked in the metal, especially in these colours. The first thing that came to mind was Transformers, and if it had turned into Optimus Prime and whacked me in the fizzog I wouldn't have been surprised. Maybe they have a new movie on the way and this bike's the star. Who knows?


It looks evil and savage, but actually pretty cool, just what I needed on today's damp roads... not. 

I've got to hand it to Mike, he buys a lot of bikes, and always asks me if I want to have a ride on them. Usually I'm busy and decline. Today I was busy again, but Suzuki projects could wait. I kitted up quickly and gave him the key to the Gixer.