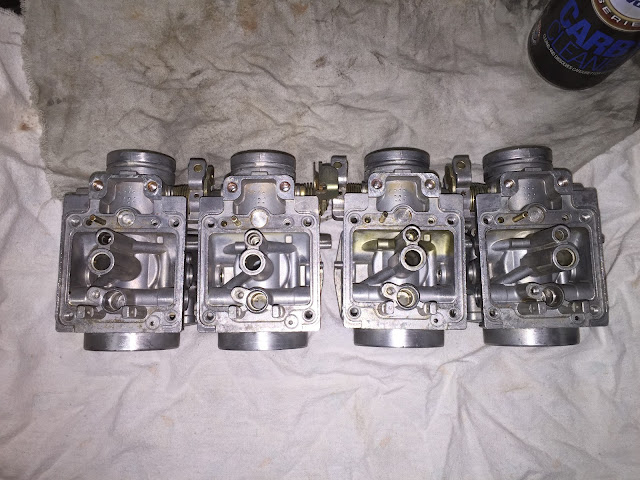
A previous post of mine described the making up of a bank of carbs from a spare set I bought. My originals had been broken by a previous owner and laid out in bits in a cardboard box. The carbs I got hold of were from a GSX750 — same bodies, but the pilot system was slightly different and the jets, obviously, were all the wrong sizes. But no matter, it proved that the GS would run... just not very well.
Because I want to put it back to standard, using the original airbox and filter, a good set of carbs was still on the wish list. And a couple of weeks ago, a bargain on eBay saved the day. For seventy bucks delivered, I had a very clean set for a GS650 on the way to me. Could not believe my luck!
It got better too, because once apart, the jets tell me that they were off the 550 after all. A strip, clean, new o-rings and we could be in business.
Very impressed with overall condition, and they came apart quite easily. Usual varnish/staining and that beautiful smell of old, stale petrol. Am I the only one that loves that smell? Comes second to two-stroke fumes for me.
Removal of the float bowls, and this is where I realised the jets all corresponded to the smaller engined bike. Happy days!
Good old Murphy! Two pilot/mixture screws were rounded off and seized in place. I warmed them gently with a torch, filled them with WD and left them for a few days. Not a hint of movement.
I headed off to the GS Resources forum for a browse through the carb section, and I soon found a great tip.
Break out the Dremel.
Now I used a miniature blow lamp to warm up the tube, the good folks at GS Resources said to keep heating until it moves. I was wary about putting too much heat into it but, sure enough, as it got to a certain temperature, the screw began to move. Keep heat on it while you undo the screw.
The diaphragms on the slides still look good. I used washing up liquid and plenty of water to clean them gently and blew any droplets of water out of them with an airline. I also rubbed the top of the carb bodies on a flat plate, with 180 wet & dry, to ensure a good seal when they're refitted.


No comments:
Post a Comment