
It finally happened, I knew the engine was on borrowed time, but it's been happily running me around for the past couple of years, relatively drama free. Now, still running reasonably well considering, it's misfiring on one cylinder and after a quick compression test, no.4 was found to be sadly lacking. You could also hear the familiar chuff-chuff out of the righthand pipe from a burnt exhaust valve.
The reason, you may well ask, why this engine was on borrowed time was because there is wear in the camshaft journals, so not ideal to do a top-end rebuild with the original head. And finding another head for one of these seems to be impossible in Australia. Plenty in the UK and America, but postage wouldn't be worthwhile.


So, as well as looking for a 550 top end, I also looked for a suitable GS650 donor too. Apparently the barrels will fit in the GS550 crankcase if you relieve the areas around the liners a little bit, and the increase in power is supposed to be immense. The 650 head has squish areas built into the head, whereas the 550 uses a standard hemispherical combustion chamber. Capacity is taken out to 673cc but the power to weight ratio, as legend has it, is better than the GS750 of a similar year. Honestly, I'd rather it stayed standard and this little race engine could go into a better handling, uprated chassis, but unless i find another wrecked 550, I'll just have to do this one.
A couple of suitable donor bikes appeared, one locally. After a quick look at that one, the cam journals were also found to be badly worn. The second one turned out to be in much better fettle. With a broken M6 in the barrels and, unfortunately, one fin broken off, it was otherwise looking pretty good. There appears to be a possible crack in the valve cut-out of one of the pistons, but this will hopefully polish out.

As soon as I had chance, I set about removing the broken bolt. Of course I went off-centre with the drill, but with a little jiggery pokery, the bits were out. I ran a 6.5mm drill through and tapped a new thread so I could fit an M6 x 1 helicoil. That job went so well I decided to take a look at the cylinder head.

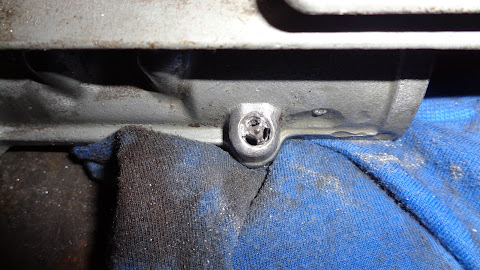
I started to clean up all the threads in the cylinder head. I highly recommend checking all threads at this stage, not when you're bolting it together. Run a tap down every thread to clean out old gasket material and check their integrity. Clean the holes out with carburettor or brake cleaner, and blow the old dirt out with an airline. Many castings have been cracked by bolts being screwed in with old debris left in the holes. Fix it while it's all in pieces.
Anyway, it was getting late and I should've called it a night, but I was enjoying myself. Then a slight mishap occurred in one of the rocker cover threads. Every time the tap went in a certain distance, it would veer off slightly. I tried to maintain/force the correct angle and it (fucking) snapped flush with the head! I haven't snapped a tap since I was a kid. Doh! Luckily it wasn't a blind hole, but a broken tap is still much more of an issue than a bolt.
With a bit of searching online I came across a tool that would slip into the flutes of a tap and, hopefully, turn the broken part out. Obviously these things are pretty fragile themselves, and taps don't snap unless they're pretty tight, but I had a plan. If I could relieve the aluminium around the top and bottom of the tap slightly, I could maybe use two of these tools to share the load.
I bought a genuine Dremel set of die grinders (cheap ones are hopeless) and set to work. Before long there was reasonable access to both sides of the tap. The removers themselves turned up very quickly, thanks to Len at LPR Toolmakers in Victoria, and I was astounded. After gently tapping them into place, and fitting the handles, the broken tap moved slightly. With a little bit of movement back and fore, it then wound out no worries! I was back in the game!

Great set this, the quality of the cutters is superb and it made the job easy.


Those are the tap removers with the offending tap. Isn't it nice when something just works like it's supposed to? That got me out of some strife!
Porting the Cylinder Head.
I do not profess to be an expert in this field. I've cleaned up many a port in a 2-stroke, and felt the pros and cons. The aim here wasn't to take the inlet ports out to cavernous size, and possibly lose air speed, but to smooth out the curves and match up the inlet rubbers. Removing casting marks, and generally making air flow easier, with an unpolished finish to aid the mixing of the fuel and air.

A 30mm flap wheel was perfect for the inlet ports. Leaves the perfect finish and left them completely round. I only want them to match up with the size of the inlet rubbers, to go larger would be pointless, even detrimental, to airflow. Run your finger around the port until you get to the valve seats, this is where you will find all the rough parts. Blending the seats to the port itself should help a lot.
Using various grinding wheels, emery cloth etc., both inlet and exhaust were much smoother, with no harsh curves. I put it in the dishwasher, after reading about how amazing this method was, but I can't say I noticed much difference. Then again, I generally rinse all my plates and dishes before risking them in the dishwasher anyway.

Next was to grind in the valves. That was so slow because the sucker kept falling off the valves (old valves are painful!), but they all cleaned up nicely. That was two goes with coarse paste, one with fine — just like the old days. I used to love that job as an apprentice!

Like a bought one!
What you're looking for is a nice grey, uniform area all the way around the valve and valve seat. Ideally, it should be in the middle section of the seating area.
If it's too close to the edge, one way or the other, the seats should be recut to make get this perfect, but this is a forty year-old bike, and this will suffice for us.

Skimming the head.
As you can see on that last pic, there is a lot of light corrosion marks around the gasket surface, but the worst part is the circular groove around the combustion chamber. I thought, at first, that this was something to do wth the fire rings of the head gasket. Alas no, these grooves were inside of that. Then a top mate of mine mentioned it could be detonation. Mmm...
so if 650 barrels fit .. sleeve em to 750 gsx ones and 225 yamy quad are 70mm 16mm pin .. if 15 mm pin 1100 sleeves maybe .. and i have some 75mm pistons 15mm pin is the 550 roller crank ?
ReplyDelete