Tuesday, May 16, 2023

Yamaha FZ750 Restoration - Suspenders and Fast Rides.

Cracking blast today!

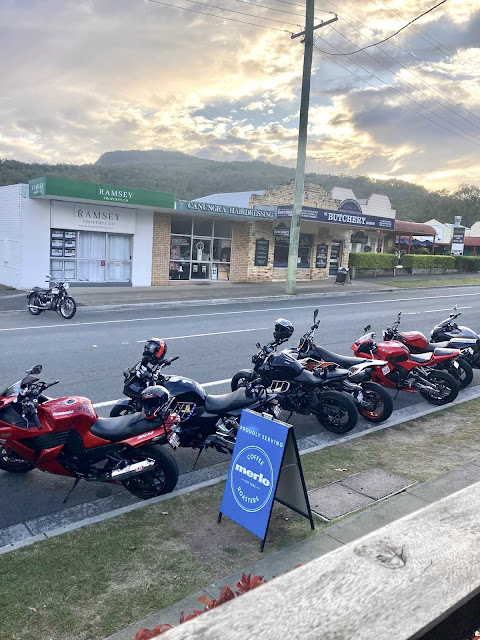
I'll digress at the start of the blog today. I'm having a great day! We all met up early for a fastish blast this morning and the 2002 R1 got to pit itself against a much-too-loud 2014 S1000RR (running 196BHP at the wheel). We also had a ZX14R, Diavel, CBR600RR, CBF13000, and an MT-07. She, the R1, limped home on three cylinders in the end but really did herself proud. 

Sunday, April 16, 2023

Yamaha FZ750 Restoration - The Shock Absorber


 Originality...

The original shock on the FZ, as could be expected, was well and truly past its sell-by date. I would have loved to use the original but I also want this bike to handle as well as possible without the costs associated with Ohlins etc. 


Finding another original shock in good condition has been challenging so far but you never know what might turn up one day. So, to allow me to carry on reassembling, I again spoke to Paulo at Motogenn and bought one from a low-kilometre 2018 Ducati Monster 821. This one was chosen as it is the same length so hopefully not too many alterations needed. It's made by Sachs and should be far superior to the original anyway, not to mention lighter.

It looks absolutely mint, and now requires a slight rejig to fit the original mountings of the FZ. No easy task as the shock has rose joints to suit an M10 bolt, whereas the FZ has an 18mm pivot pin running through the lower mount. The top mount is an M12 bolt but, with spacers in the top rose joint removed, the FZ bolt is a perfect fit. It just needs some spacers to maintain its central position.

I pressed out the lower bush in the vice, and started measuring.

The bushes in the original FZ shock appear to be Teflon-coated, like fork bushes, so I made a puller to remove them for inspection. They look great so I will make a steel bush to fit the lower shock eye, fit the bushes inside and finish it off with some spacers to keep the shock central and prevent any wear occurring against the aluminium bracket that the shock is mounted to. 

This is the steel bush that will go through the bottom of the shock. The original bushes will be pressed inside. I'll probably fit a grease nipple to the pivot pin so I can grease the bearings to keep dirt outside. More on that later.

The bushes were drawn in using the puller I made earlier and worked a treat. I also made end caps to fully support the thin bush when the pivot shaft is fitted. These will also prevent any wear to the aluminium bracket.

There is the new main shock bush with Teflon bushes inside. Those are the two end caps to keep everything central.


This is how it will fit inside the monoshock bracket under the swingarm. The pivot pin slides through and has a circlip fitted for safety. The two M6 clamping bolts prevent any movement.


And finally with shock mounted. The Teflon bushes are smeared with a light Lithium grease when assembled. I was going to add a grease nipple to the end of the pivot and drill three small holes along it to grease the bearings when I wanted to, but the shaft is hardened, as expected, so I will leave it alone. 


That's the puller for removing and refitting the bushes with no damage whatsoever. Worked perfectly.


Ok, will post more when the swingarm is mounted.

Friday, April 14, 2023

KTM Superduke 990R - New Tyres and Sprocket Carrier Bearings


Four years too late...

The old Superduke of Bridgey's has been somewhat neglected lately. And when I say lately, just the last four years or so. It's still pretty clean, don't get me wrong, but legend has it Boudicea was using the same tyres on her chariots. 

Now I wouldn't have bothered putting up this post for a pair of new Pirelli Rosso II's but, what was concerning, was the state of the sprocket carrier bearings. Well, one in particular.

The Superduke has some great engineering plusses, one of which is the two bearings fitted to the sprocket carrier. Four bearings in all to let the wheel spin in the manner to which it's become accustomed. Imagine the rigidity, the ability to keep that wheel inline no matter what angles it's trying to put down the power.

As much as I like to take the piss, it's a bloody good idea.

But during a routine tyre change, it became obvious that all was not well in the bearing department, and the sprocket carrier was extremely notchy. The two spacers that go in from both sides were rusty and I wondered if the water had been held in there and got past the seals.

The two spacers on the piece of wood need to be knocked out first. Then the bearings can be hit out, one from each side taking note of the small spacer in between.

A closer look at the bearings with seals removed showed the carnage. The cage had broken up and it came to a premature end. The cause? Possibly overtightened chain at some stage.


After a good clean-up, two new bearings were fitted and everything was good again. A good reminder to always turn the bearings by hand whenever you take the wheels out, any notchiness and it's time for replacement. 

If you're very careful when removing the seals with a pick, you may be able to clean them out and regrease them, as long as they are smooth and quiet, but for the cost of new bearings, it is advisable to replace them when in doubt.

Anyway, it's certainly nice to see the old girl back out and fighting fit.


Sunday, February 26, 2023

Yamaha FZ750 Restoration - Clip-ons (handlebars)


 I got a bent one!

So the left clip-on has taken a bruising at some stage, not to mention the rust. I initially thought it might be able to be straightened but it had flattened the tube where it was bent and would never be right however much you looked at it. Secondhand ones are few and far between, and expensive, and I didn't want to risk getting another bent one.

On closer inspection of the offending item, you can see where they are originally welded to the cast clamp. With a bit of careful drilling and jiggery-pokery, we should be able to get the old steel tube off the clamp itself. It was pretty solid but gave way in the end. 

I cut off the bad section and placed what was left in the lathe to take the outer diameter down enough to remove the threaded section that holds the bar end weights. Eureka!

All that was left to do was to go to the steel shop and pick up a length of 22mm pipe with a 2mm wall thickness. Pretty common, one would hope. Not in Australia it would seem, it's no longer available.

I then ordered some "Pipe Furniture" sections which were supposed to be 22mm O.D., but even they turned out to be 21mm. Bridgey pointed out the old handlebars on the ZXR project bike (more on that later) and it gave me an idea. A set of straight drag bars should give me the dimensions I needed. Then I remembered a load of factory-seconds bars I bought and stored a while ago. I already had the correct material in stock!

So this is how it looked. The end is pitted with rust because Yamaha didn't paint them right to the end. For obvious reasons on the throttle side, I guess, and then they just wanted them to look the same.

Friday, January 27, 2023

Yamaha FZ750 Restoration - Burleigh Powder Coating.

The Frame is Back!

True to their word, less than a fortnight later and I got the call that it was ready to pick up. I was slightly apprehensive due to the fact that the rust was pretty bad, with heavy pitting. When you don't get to see what's left after blasting, it's always a worry. It's not cheap either. 

Would I have been better off with a wire brush in a drill and using aerosols? 😟 That would have taken forever as it's a big, complex frame. And the results are never the same when spraying a frame, overspray always dulling one side etc.

The powder coating on the BSA frame is still superb after thirty years, so I'd pretty much made my choice.

First, a wee recap. She was looking a little worse for wear...


The photos actually make it look far better than it was. Brake fluid had taken paint off in some places, rust had started taking over everywhere else. The centre stand looked like it had been dragged up from the Titanic.

Monday, January 23, 2023

The Yamaha FZ750 Restoration.

Blown away...

Carlsberg don't do projects, but if they did, they'd probably be the best projects in the world. Quite frankly, if a restoration project could be ideal, this one could well be it. Admittedly, the plastics are a bit rough, but mechanically she's proving to be pretty good.

After getting the engine running, the bike was quickly stripped and put into boxes. From here I will take pics, and start on individual components. If I get a bit fed up with doing one thing for too long, I'll move on to something else to break up the monotony. It's easy to get overwhelmed when stuck on a time-consuming part.

Anyone who has pulled old machines apart would be familiar with stripped heads on screws and bolts, especially when some of the bike is as rusty as this one. But, as corroded as every fastener is, everything came apart like it was put together last week! It's been surreal.

I had noticed play in the front wheel during the strip-down and was pretty shocked to find this. 

Sunday, December 4, 2022

1985 Yamaha FZ750 - The Start Of A Restoration.

Honest, it followed me home...

There are still quite a few bikes that I want to own one day, mainly nineties sports bikes, a few really old bikes, and quite a few other odd ones that might just happen one day. One I've been after for quite a while, especially since seeing a lot of restomods on them, is the FZ750 - the half-faired, original version. To me, that thing is sheer beauty. 

When one popped up at my favourite bike breakers - Motogenn, in Burleigh, Gold Coast - I sent Paulo a text "Put my name on it! I'll take it."

Paulo insisted, "Come and have a look first."

"I'll take it!"

For those who don't know Paulo, he is an absolute gentleman, extremely helpful and who deals in mostly modern motorbikes. I've had several parts from him for the R1, amongst other projects, and his prices are the fairest around. Anyway, I popped over for a look, said yes I'll grab it, and came back with the money a few days later. She's gonna be awesome!

Loading it in the van was easy, Paulo had a decent ramp to get it in. It took two of us to push it in (it has no working brakes) and it just needed a good, confident shove. 

When I got it home, I had no such luxuries. I found a shitty old pallet that was nowhere near long enough and got ready to launch it on my own. Figuring this would end in disaster, I asked a neighbour to help me. She quickly, and quite rightly, declined but said her housemate, Corey, would love to. So, out comes old mate, barefoot and looking somewhat bewildered. I told him to jump in the van and hang onto the handlebars, and I would hold the back as it rolled down the pallet.
This would have been ok, had the pallet not given way under the weight of the back wheel which then left the bike jammed on its exhaust and on the edge of the van. Bugger! It just needed a good pull backwards to free it and, sure enough, with a good tug, we were mobile once more. 
And this is when things got exciting for old Corey. I didn't have much control after getting it moving and the bike shot out at great speed with Corey hanging on for grim death, straddling the front wheel, barefoot and quickstepping on a very steep, rough pallet. All I could think was we are going to drop this bike, but no, Corey hung on well and it stayed upright. He was bloody marvellous to be fair and, legend has it, he even had most of the splinters out of his feet by the morning.

Monday, October 24, 2022

Replacing Brake Seals on Triumph T150V Lockheed Caliper.

She is heavy, and she ain't my brother...

Ye olde Tridents were heavy. There's no way to sugarcoat it, modern bikes are an absolute joy to move around compared to the bikes of the seventies and eighties. I really feel for the older riders having to sell their old 750's and 1000's due to weight, but completely understand why they have to do it.

But it's not just the struggle onto the centre-stand, or moving it out of the garage. You sort of rely, quite heavily (oof is that a pun?), on the brakes to haul all of that extra weight up. And a fixed, two-piston caliper, on a small solid disc, needs to be in pretty good condition to do the job. 

Well this bike is a 1974 model... and it is now 2022, and this is probably its first seal kit. It's done well! Not that it was leaking or anything. The pads weren't binding on the disc either, in fact, everything was pretty good. But the old seals were pulling the pistons back further than they ought to which, to the rider, means much more lever travel before retardation takes place.

Sunday, October 23, 2022

Repacking Your Can, Exhaust, Silencer or Muffler.

Shut it! I can't...

Before I start, I love quiet pipes, and wish I had the standard can for the R1. Better for my ears and attracts a lot less attention when you're bouncing off the limiter. The Bandit has quite a nice deep tone with its db killer in, but the R1 was a little more raucous. Time to repack it.

With a little research done, I've been hearing good things about Acousta-fil fibreglass packing. Not cheap, but worth it if it lasts a few years.

Here's the Australian-made Screaming Demon can that was fitted to the bike when I bought it. A little long by modern standards, and takes me back to the Hindle pipes of the nineties. It's good quality, but I want rid of the main badge and will rotate the can so the small maker's badge at the bottom is hidden around the back.

Tuesday, September 27, 2022

'02 - '03 Yamaha R1 Fuel Light Flashing Eight Times

How to fix...

There are a lot of opinions out there regarding this fault, and some would have you believe it's an engine management issue. But this is down to the fuel sensor circuit only. 

Sunday, August 28, 2022

Replacing the Gear Change Spring on Swinging Arm BSA A10

Working on the A10...

Being pressed back into action for the first time in years, you sort of expect a few issues. The only thing that went wrong was the gear change return spring snapping, but did it leave me stranded? Not at all, shoot back home, take off the cover and order a new one. It was there the next day! 

So, without further ado... The outer cover comes off easily with four nuts to remove and three screws. The kickstart and gear change can stay attached at this stage and makes it easier to remove the cover. Also, the outer cover can be removed without affecting the gear indexing so makes this a very easy job.

With cover removed, you can see the offending item sticking out behind the gear change mechanism. The split pin, visible here, can stay in place, just remove the tiny circlip from the outer side of the cover and the whole unit will slide out from this side, revealing the spring.


Classic Brit Bike Road Test Fest!

Biketech7 - Back to the UK for a Roadtest of the Past.

What can I say about the latest road test? It's been a while, but this was pretty unique. To ride old faithful was gift enough after all this time. Sat for the last seven years with oil in its petrol tank (thanks dad), the '54 A10 astonished me. Still a first-kick starter, petrol tap on, a quick tickle and it was running. Effortless, except for the hefty heave on the kickstart, I couldn't have been happier. But to get out on the other two bikes too, outstanding!

Devauden.


Early evening in Tintern.


The next bike to get an airing was the '59 T110, pretty much an original bike, and another easy starter as long as you remembered the retard lever. I was rusty. I forgot. Still, the old Triumph is a true gentleman, or lady, and was perfect once up and running. Certainly more oomph from the Trumpet, and the front brake was a hell of a lot stronger, but annoying play in the head bearings became a pain when upping the pace. More on that later.

Monday, January 10, 2022

R1 Streetfighter - What'll She Do Mister?

WOW!

Considering the old tyres, this bike impresses immediately. Admittedly a little bit wary on roundabouts because the tyres are as hard as wood - but as they clean up a little, it starts to inspire a little bit more confidence. (They will get changed for Rosso II's soon, I just wanted to make sure everything else was going to hold together before lashing out on new boots.)

Suspension is nice, sublime, stiff but supple, and doesn't pound you like the Bandit or older bikes. Old, conventional forks don't caress you in the slightest, they can leave you feeling tired and drained after a few hours. Modern (we're talking twenty-year-old modern) forks can deal with the shit underneath, and leave you feeling pretty bloody rested in fairness.

The naked R1's biggest attribute? It's absolutely bloody solid! 

A massive difference when compared to a frame with some flex. And with the ProTaper bars, you're pulled forward enough to be in a slightly racer-like position, which is much more comfortable for me than sitting dead upright. This oozes quality, and you can feel how capable a bike like this is straight away. If it was the faired bike you would expect it, but the handlebars make you think differently.

Now the engine feels harsh at lower RPM (wear/issues?), but as the power winds on, oh so nicely, it smoothes out. In any gear, a quick blast up to the ton is a walk in the park, like any sportsbike should be. I think this is a much better hooligan tool than the fully-faired bike, and I look forward to getting a few lessons.

I've not done enough miles yet...

I'll be back with more soon, but I really like it.  It's quick, and it wheelies much too readily when you give it large. Yeah, this will be a fun bike. It inspires enough confidence to let you know that it will look after you whatever happens on the road, but is going to throw your bollocks in a bush if you start taking the piss. 

On that note, here's a video of it sat still, where it can't do any harm.

Tuesday, January 4, 2022

Yamaha R1 Streetfighter - Wiring To The Finish!

 Tidying up the wiring...

So far, the most painful part while knocking up the streetfighter has been the wiring or, more importantly, where to hide it. While also making it look tidy and functional. Where the manufacturers have loads of room within a fairing to put everything neatly, we need to move it somewhere else.

Traditionally, the headlamp shell would hold a fair section of wiring, but my LED light is pretty chunky and I'm guessing it's going to run quite hot with the huge heatsink on the back of it - I'll keep an eye on that.

There seems to be a fair bit of room under the airbox (above the engine) so I'm putting what I can in there. I'm also moving two relays under the seat along with the fusebox, purely for ease of access. The fan relay can stay under the airbox. I'll keep the headlamp fairing loom intact with all plugs so it can be put back to standard at a later date.


Wednesday, November 17, 2021

Yamaha R1 Streetfighter - Repairing Bodywork

 The Tailpiece...

Finding a secondhand tail for the R1 was becoming a pain. Cheap enough in the States, rocking horse shit out in Oz. I decided to give repairing it a go. It was cracked in several places, missing a chunk of plastic just under the seat, and both mounting brackets were broken off and missing. Not a good start, but not impossible.

I'm not a huge fan of plastic welding on fairings — I haven't come across a really strong weld yet — but am open to it if someone can prove the join is stronger than the original section. I am going to superglue the cracks shut, then fibreglass behind them. Yes, fibreglass is messy, but extremely strong and durable. With a light skim of filler, I'm hoping to get away with it.

The pointy bit under the seat will have to built up first in fibreglass, then shaped with filler. I consider this to be skill-building, and I need the practise with filler anyway.


Tuesday, September 7, 2021

Yamaha R1 — Project Streetfighter.

I love a bargain... or punishment!

Gumtree and Marketplace are taking up my life. Both sites are out of control! Where commonsense once led the way, I keep asking:

1) Do I need another project? No, I have too many, walk away now.

2) Do I need another project? Of course, one more wouldn't hurt.

After all, I could sell something to make more room...

Streetfighters.

I've always wanted the genuine sportsbike version, with all the proper kit from the period - suspension, brakes etc. - but never felt like ripping the fairing off a perfectly good bike. So I kept my eye out for something that maybe didn't matter. Something that hadn't been looked after in the first place and either needed new fairings, or a new look altogether.

So what is it about the older sportsbikes?

They're old school cool, and aggressive. Making good power, proper suspension, with handlebars and no fairing. What's not to like?


Tuesday, May 18, 2021

Suzuki GS550E — NOS Seat!

Finally found one 😉

This is just a small post to say that i finally found a brand new seat for the GS550!

A legend in Germany had one for sale on eBay and it arrived recently, looking pretty bloody good too!

I ordered new hinge pins and, after years of having to make aftermarket parts fit, was ecstatic to find it just went on and that was it. No adjustments, no cutting or trimming, it just fitted perfectly, on a forty-year-old bike.

To find a seat pan like that is the holy grail. The trims, the strap. WOW! 😍


So nice, and unusual nowadays, to have the original design on the cover. 


I know it's only a seat, but I've been looking for a good used one for bloody ages. To find a new one blew me away!


And it looks amazing!


And what a difference to the way it rides! 

The comfort from this seat is just unreal compared to what was on here before. I had no idea how much the seat forms part of the suspension before, keeping you isolated from the pounding of the road. It now feels like you could cover massive distances in a day. I'm so impressed with it.

And being that much thicker than the old one, my knees are no longer so bent up either. In all those years of riding, I've only ever had one new seat before and that was on the BSA in the nineties. It'll be much higher on my list of priorities for the old bikes in the future.


More soon...

Thursday, March 11, 2021

Suzuki GS Series — Starter Clutch Rattles

The final check?

As anyone who has followed this blog will know, the engine out of the GS550E has been stripped completely. And, obviously, this was the ideal time to do a simple check on the starter clutch. And I full intended to, had I had the correct flywheel puller. A simple M14 x 1.5mm bolt is all it needs...

But no!

I'd already bought a pretty extensive universal puller/slide hammer with all sorts of adaptors, but none of them being a basic M14 x 1.5mm bolt. Anyway, I ignored it, and refitted the crank with flywheel still attached, not realising what could happen behind the flywheel.

And there it is, flywheel/rotor with starter clutch and gear bolted up behind it.


Suzuki GS Series — Clutch End Float.

Low speed rattles?

There's a few common places that annoying rattles can resonate from on ye olde GS. One of them being the clutch.

It's a heavy unit to be spinning around on the big needle roller bearing and you will always see and feel the [normal] movement when you get hold of the clutch basket. Considering that the huge helical gear around the outside of it is being driven by the crank itself, movement isn't what you want. That sort of freeplay doesn't really matter, for instance, if the clutch is being driven by chain or belt as there is more flex. Gears don't exactly flex, but they will wear. 

On top of this, there is a gear sat behind it, driven by the basket, which then drives the oil pump. A lot going on for something that only has one bearing. 

Now a couple of the intelligent folks at GSResources forum removed some of the play by machining a little off the bearing hub that runs on the inside of the needle roller bearing. In effect, this removes a little of the end float and holds the basket at the angle it was designed to run. Thereby keeping the gears at the correct angle, and reducing some of the noise inside. Sounds good huh?


That's the back of the clutch basket. The large gear is driven by the crankshaft. The two slots in the back of the clutch centre drive the gear that, in turn, drives the oil pump. The springs you can see are for cushioning take up of drive as you let the clutch out to pull away etc. These sag slightly with age and, ideally, need replacing because they start to rattle. Or, as I was about to do, you can shim them with washers to quieten them down.

So this unit has a few jobs to do. Probably best that it spins as it should instead of flopping under its own weight...

Saturday, March 6, 2021

Suzuki GS550E — Steering head bearings.

Wandering Aimlessly...

Since the new Metzelers have been fitted, there has been a slight weave at low speed. I hope it's a steering bearing issue and not a trait of the new boots. Being as it was on the list of to-do's for along time, I ordered a genuine top bearing from Suzuki, as there doesn't seem to be an equivalent generic part number, and the old "32006" taper roller from the local bearing shop for the bottom yoke.

While it was apart, it would be time to clean up and paint various parts on the front end. A month and half later and I'm still waiting on the springs to come from America. Postal service is struggling as they're waiting for flights!

Anyway, back to the clean up. The main things on the list were the yokes/triple clamps, headlamp brackets, indicator brackets, and maybe the speedo surround and headlamp itself.


Sunday, January 10, 2021

Suzuki GS550E — Quarter Turn Throttle Conversion.

 Converting your throttle tube to a 1/4 turn.

I'm pleased to say the GS550/673 is going really well — the engine has been faultless so far. One thing that is annoying me though is how bumpy the front end is, and it's really obvious since sorting the Bandit. The 1200 front end is now feeling incredibly refined and plush after a fork oil change, so I wanted to change the springs in the front of the GS to try and help her out.

As luck would have it, a pair of new Progressive springs came up on eBay for $110 delivered. Result! Although the general consensus now is to fit straight-rate (linear) springs, this was a bit of a bargain. However, they got stolen on the day they were delivered by some scrote who told the postie that they lived at my house. And that was the smaller of three parcels! Luckily I got my money back via Paypal, but that's besides the point. I was not impressed.

Saturday, November 28, 2020

Metzeler Tyre Test — Suzuki GS550E

First, a bit of history... hey, life isn't all just fun you know!

When the old GS came to me, that fateful morning in 2012, I knew it was going to change my life. It sat there for a long time, mournfully looking to be put back out there, to race around on the mountain roads, to show what it was really capable of.

But I had a GSXR1000 and a DRZ400 supermoto for the fun stuff. This one would wait. However, it kept looking... and I kept ignoring. 

Until, one day, it was reassembled enough to run under its own steam. The excitement was building. The little GS felt proud, there was potential and we could both see it. She was ready to go out and try the roads for the first time in years. The front tyre, however, was looking a bit lame. So I bought a secondhand Dunlop on eBay that was originally fitted to a Harley, the little GS wasn't happy about that, but it meant we got to ride. The rear Barracuda (the what?) had plenty of tread left so she was good to go. And for years she rode around on those old tyres, the front now being seventeen years old 😱.


Thursday, October 8, 2020

Suzuki GS673 Conversion — The Road Test.

 What'll it do mister?

There are no certainties in this life. All we can do is work with the best we've got, and to the best of our ability. When you work with old vehicles, you are left with a hell of a lot of choices. Replace everything for fear of something breaking down the track, or use experience to decide what will keep going, and maybe rely on a little bit of luck. It's probably fair to say we use all of these methods without a second thought.

It would be nice to change every bearing, gear, thrust washer, bolt, moving part etc., but that generally isn't viable. Instead we check, measure and work out what we can get away with. Lots of parts aren't even available anyway so sometimes we are stuck with far greater tolerances. When there is wear in vehicles, we immediately feel it when we ride or drive them but, as human beings, we automatically adjust to cope with the discrepancies. Some better than others.

Sure it's nice to be on a brand new bike, where everything is perfect, but they also leave me feeling somewhat robbed (not just with the cost of them either:). They let you get away with things, incredible brakes, plush suspension, tyres with more grip than you know what to do with. You may even think you're better than you actually are (oof, perish the thought!). 

But with old stuff you feel everything that is happening, hold the bars too hard through the bends and the weaving starts, fight it and things get worse. But relax and let it work everything out for itself and they usually settle down quite nicely. You feel that you're achieving something, that a living being is out for a blast with you, stirs the soul don't they say? (It does get tiring though...)

So ladies and gentlemen, just once, get on an old bike and be amazed at what they will do if you're just prepared to put in the effort...


Saturday, October 3, 2020

Suzuki GS550E — GS673 Conversion Progress.

 Finally getting there...

Once painting of the cases was done, I put the crank and gear clusters back in the crankcase. Turning everything over, something I hadn't noticed originally was pitting in the teeth of one of the gears. It turned out I needed sixth drive gear (obviously unavailable from Suzuki now), but a search on eBay came up with a NOS one in Cyprus. With a delay on postage due to COVID-19, all I could do was wait. 

The pitting is visible in this pic. The largest gear in the top cluster.


One NOS gear from Cyprus. Whoop!